| C6owners :: Forums :: C6 Support :: C6 Navigation questions and Map or Software Updates |
<< Previous thread | Next thread >>
|
Citroen C6 RT3ev/4/5 30GB Hard Drive to Flash storage (Sd/MMC/SDHC/SDXC - 2024) |
    Please Register to enjoy additional Member Benefits |
| Author | Post | ||
Ranger12
 
|
|
||
  Member No: #4492
Location: Somewhere in the darkest recesses of England |
Citroen C6 RT3ev/4/5 30GB Hard Drive to Flash storage What you will need;- 1) Compact Flash CF Memory Card to 2.5-inch 44Pin IDE Laptop Male IDE Hard Disk Drive HDD SSD Adapter. - Click Here - 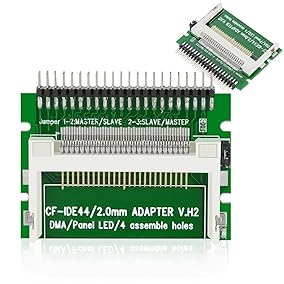 2) DIGIFLEX IDE Caddy - 2.0 IDE to USB HDD Hard Disk Drive Caddy Enclosure Case - for External Hardrive Transfer Data and Files - Hot Swap - Plug and Play - Tech Accessories. - Click Here - 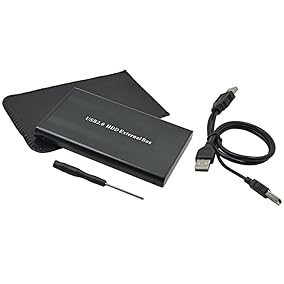 3) BOWONG SD - CF Card Adapter Wireless Wifi SD MMC SDHC SDXC Slot To CF Type I Compact Flash Memory CF Card Adapter High speed for SLR Camera. (This card CF adapter Card is UDMA 6). - Click Here - 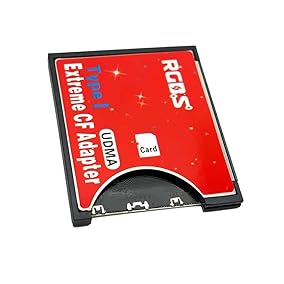 4) Any SD, MMC, SDHC, SDXC card over 30GB (I used an Addlink Micro SD V30 XC 1 64GB Card in a Addlink Micro SD Adapter (comes with SD Card), which slotted into the BWONG Sd to CF Card Adapter) 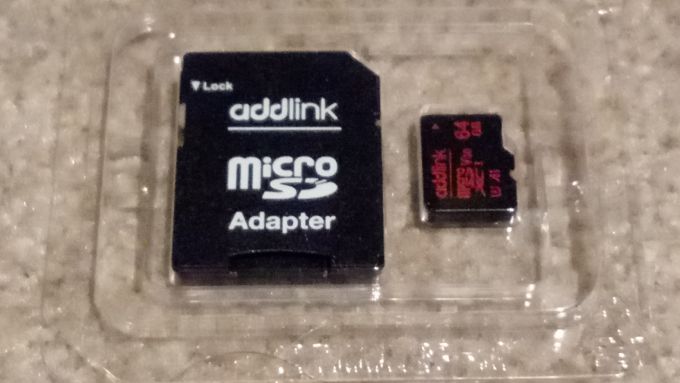 5) A PC running Linux is prefferred, but not essential (depending how you upgrade). 6) Familiarity with using disk cloning/imaging software. 7) 1 x T9, 1 x T10 50mm screw drivers (to remove the unit from the dash, and to take the lid off the CD player) 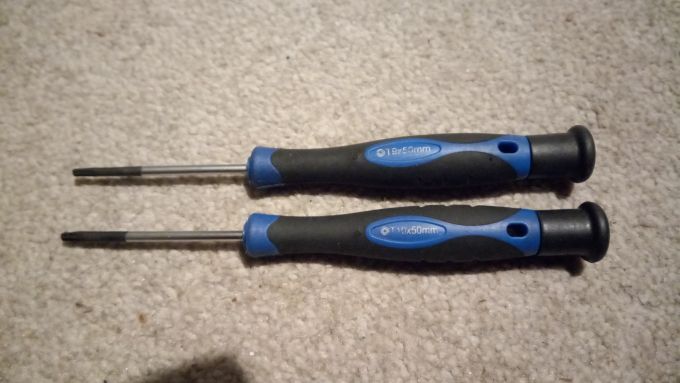 8) Minimum of 40GB HD space, double that or more depending on how many backups you make for testing purposes. PREAMBLE Assuming your Hard Drive hasn't already died, the following are the steps I took to upgrade to flash storage. There are other guides on the net (not many) to upgrade the RT4/5 HD to Flash (SSD is NOT recommended due to trim considerations), which involve trying to find a 32GB UDMA-6 CF Card (Kingston usually recommended), which these days are very hard to find, and very expensive, and also most likely with the modern crop af cards, UDMA-7, which causes Issues. I tried the methods on other sites, but no matter what I tried I could not get the car's system to read the new drive. Using Linux Mint, I was able to take an Image of the 30GB HD, and was able to repair errors in the file table of the HD, which resulted in temporary improvements in the unit, but after a couple of days, the same faults re-appeared, and continued to get worse (Central locking was getting increasingly harder to use, but when I repaired the errors on the HD, this stopped immediately, but would then creep back in, and then there were the system resets whilst driving on the motorway at night). After each atempt I rescanned the 30GB C6 HD and again found errors in the smallest volume (1.2GB), confirming to me that the disk does have bad sectors in this portion of the drive (which holds user settings and SPY logs). After several failed atempts with 32GB CF cards (all turned out to be UDMA 7), I came across an SD to CF Card Adapter, with the Card Adapter being UDMA-6 Compliant, and reasoned that it should be possible to put in any other card the adapter supports, as the adapter itself handles UDMA, meaning the card behind that could be pretty much any SD, MMC etc. I haven't fully tested this idea with other types of cards, but it seems the logic paid off, and I ended up with a fast working system in one shot from the method I decided to use. METHOD. -------Radio Removal & HD Extraction--------- 1) After opening the doors, sit in the car with ignition off and keys out, and wait for the fan in the Radio unit to stop making noise (don't use the radio or press any buttons on it). 2) Using the T10 Screwdriver, unscrew the two screws hidden inside the two holes either side on the front of the Radio unit. 3) Gently pull on the Adjuster knobs to start moving the unit out of its mounting, then when the sides are more accessible, pull the unit out as far as you can (gently), and carefully remove the largest block connector unit only from the back of the radio, using the blocks built in pinch & lever. 4) You should now have enough room to pull the unit a bit further, and rest it on the gear selector (You may need to move the selector/Gear lever to better facilitate that). 5) Using the T9 Screwdriver, undo the four small screws on the top panel, noting where the small screws sit (short = front, long = rear). 6) carefully lift off the cover noting how it slots in at the back. 7) The CD Drive now needs to be removed, and it is loose (no screws), but there is a ribbon cable underneath which needs care. 8) Very carefully lift the cd player, it can snag on the front left corner so be careful, and as you feel it coming up, turn it gently on its left side to reveal the fat ribbon cable. The Ribbon cable is attached and held inplace by a very thin black flap, on a white connector. Lift this flap carefully with a fingernail, then again carefully, pull it out from the connector. You will see that there is a bit of the cable that goes around the back of the connector to hold it in place, so lift a corner of that, whilst gently pulling downwards, and the ribbon should slide out easily. 9) With the CD drive removed, the 30GB HD should now be visible. Be very careful on this part. Using one of your screw drivers and working from the front of the drive to the back, carefully prize the corners until the drive has come out of its plastic spring retainers. Now put a finger carefully to the root of the drive-to-cable connector, to help with pulling out the Hard Drive from its socket. DO NOT TUG ON THE HARD DRIVE WITH OUT SUPPORTNIG THE RIBBON CABLE side of the connector, and again be very gentle (no bangs or sudden, sharp movements). You will likely find this is a tight fit, and you will have to ease it out bit by bit at first, and try not to bend any of the pins. 10) At this point I should point out that the ribbon cable is iteslf attached to the board to the rear, and after removing the HD, you should make sure that connector is flat and pushed properly in its connector (I did this with my T10 screwdriver, gently prodding down on the ribbon back connector to reseat it, as I had managed to pull mine partially out during HD removal from the IDE connector. ------HD & Flash Section------- 11) Put the extracted HD into the External IDE USB 2.5" HD Enclosure (In my case the DIGFLEX IDE Caddy), and plug it into your PC. 12) I use Linux all the time, but I will try to advise on areas you need to watch out for if using Windows. Mac users should be able to get the idea from the Linux instructions. 13) Once the HD has shown up in the host's file manager, you will need to make an image of it, which means you will need more than 30GB's of available storage for the Image file. In Linux programs like Parted, Gparted, & KDEPartition Manager, these programs offer the ability to directly make an image of the entire HD. There are command line programs too like DD, but that requires familiarity with the command line system on Linux, so I will stick with GUI options. On Windows there are many programs like Clonezilla which do the same job. The term 'Clone' and 'Image' reffer to not just copying files and folders, but the entire file structure including all the partitions and Master boot records. 13a) I used Linux Mint's 'Parted' program (Gparted and KDEPartiton Manager do the same), to check each of the four partitions for errors, and all of them had such, however I made an image of the drive as was, then when I used the fix function on all four partitions of the original 30GB HD, Parted reported back an error, yet on rescanning for errors, it then reported none. When I was satisfied all was ok, I then made a second image of the HD (so I could test if the file repairs prevented the car from recognising the HD - it didn't. I did it this way so that if it failed, I could restore the original unfixed image to the drive). 14) There are two main methods to getting the contents of the original HD onto Flash storage, in a way the car's own system will recognise it. In both cases it is important to backup your HD to an image(clone) file, as this will help you immensely if there are problems in the future, as well as giving you the ability to convert to flash or restore to a new Hard drive. Where the methods differ is that one method involves using the cloned image (which can also take errors with it to the new medium) and restoring that image to the new Flash or HD to be used, or put in either a blank HD or Flash medium, and using the cars own Firmware Update (8.31) in the cd player to write the new partitions to the media itsef, then copy the files in each partition from your previously backed-up image file (you will need to be able to Mount your image file, I can do that already in Linux Mint, but Window users may need another program like Daemon tools to mount their images first.) 15) Both methods have downsides, as does using windows for this. If you use windows to copy files from one device to another, windows adds hidden folders as part of the file copy process, so you may need to remove those folders before installing back into the car, or the car system may not recognise it. I have gone for the direct imaging method (cloning the original, then putting that image onto the new medium, using Linux, because I can use Linux to also repair the partitions without it hard-marking bad sectors. In my case my 'Parted' program on Linux Mint informed that as it could not read the damaged areas, it would replace those areas with Zeros in the image file. This is important as it means that although I am imaging a damaged disk, I know that disk still boots up and works generally in the car, but the actual corrupted data does not get 'cloned', which leaves options open for the new card, and the missing or damaged data can be restored using the Firmware Upgrade Disk (8:31), restoring full functionality - that's the theory at least, which so far seems to have worked for me. 16) As I chose the clone method with linux, I will continue with explaining that method as a guide to others. 17) When you are satisfied you have made 2 good images of your OEM HD (one original unfixed, the second fixed), put your MicroSD card (or MMC/SD/SDCH/SDCX) into it's holder, then insert that into the Sd-CF Adapter, then insert that into the 44Pin IDE CF adapter. Make sure you set the jumper on the IDE adapter to the 'slave' position (on cards with two pins 'slave' is acheived when no connector is joining the two pins, on three pin cards the selector needs to be changed from 'master' position (connecting the first two pins), to the 'slave' position (connecting the second and third pins with #1 open). 18) Install the whole adpater into your 2.5" IDE Enclosure where your 30GB HD was connected to your PC, then using the program you used to make the images, restore the fixed image (second fixed copy) to the new Flash card. 19) When this process is complete, remove the whole adapter from the 2.5" IDE Enclosure. ------Installing the Adapter (or New HD)-------- 20) Taking the same care to make sure there are no electrics on as in the first steps (if radio is disconnected watch for the parking brake light to go out), again be careful to not use any of the car's electrical devices as this could damage flash media and HD's alike, install the whole IDE/SD-CF adapter into the bay where the hard drive used to be (here some will also add sticky pads so it doesn't flap loosely around, but wait until after you are sure it is all working), and note that there should be 4 pins free on the left of the connector, as this isn't a hard drive (and the reason you need to change the jumper to 'Slave' setting). 21) Carefully re-attach the CD unit to it's ribbon cable, and carefuly place it back in its cradle, then put the lid back on with screws, then re-attach the big block connector, making sure you use the built in lever to fully seat it home. 22) Push the whole radio back into its housing, then using the T10 Screwdriver, secure the unit. 23) You can skip the last bit until you are happy it all works, but it is better to at least make sure the lid is secure on the unit first (it's only four screws, but prevents the unit from flexing, and blocks out light from the CD Player. 24) On my C6, the main issues I had were increasing resets of the main system whilst driving, and rapidly deteriorating central locking control, and I had previously noted that every time I repaired the OEM 30GB disk, this would instantly dissapear, the remote worked straight away, but within a couple of days the system got worse again. 25) On fitting my IDE-CF-SDCX 64GB combo, I sat and activated the door locks, which imediately responded, then just for good measure (I was actually convinced I was going to be dissapointed) I got out, locked the car without having turned the ignition on, then came back in an hour, and the locks still opened with one touch of the fob, so I then put the key in the ignition expecting a black screen or stuck citroen logo, and within two seconds the whole shebang came online. I had to reset the time, but so far nothing else, all my settings and music are ok, and the menu is noticably more spritely. Obviously you don't have to wait like I did, you could go straight to turning the ignition on, I was having a bad day until I saw it all start working. I do still have to run this for a few days, so there may be more to report, and I don't know how long the 64GB SDCX card will last, but I will also be re-installing the 8:31 Firmware update and all my maps to 2017, to ensure that all the data that was missing, gets refreshed. I hope my explanations help as a guide, and to show that you can use any sized, reasonable quality SDCX cards in a SD-CF Adapter, itself installed into a CF to IDE adapter. In the future, and when I am certain this is a genuine solution, I will be experimenting with increasing the storage area sizes, and to see what other cards will actually work. For me I had to go this route because the cost of obtaining a new UDMA-6 CF card proved to be too much, when most are UDMA-7 and above these days. Kingston's modern 32GB Extreme cards are UDMA-7 with UDMA-6 backwards compatibility, but I haven't yet tested that as I was only able to get a second hand one at a reasonable price - 32GB cards are not that popular, and UDMA-6 was surpassed a while ago. I hope this solution helps others to be able to use cheaper and more available SD card formats, which as long as you have backups (clones/images) means you should be able to easily replace any further failures, cheaply, and quickly. I see no reason why this would not work on all RT3EV/4/5 units in C6's, but this was done on my 2007 Citroen C6 2.2 HDI Manual (today @ approx 146,500 Miles). Next job - replacing the screen which has started to get lines appear in it. |
||
|
|
|||
C6Dave
 
|
|
||
    Member No: #1
Location: Northumberland |
Thanks for taking the time to create this, hopefully it proves useful for others. I have converted it to a downloadable PDF - Click Here - so it's easier to refer to if undertaking the update |
||
|
|
|
||
cruiserphil
 
|
|
||
   Member No: #38
Location: Celbridge |
Thanks for doing that Dave, Best regards, Phil C. |
||
|
|
|
||
AndreSMCXXMC6
 
|
|
||
 Joined: Sep 09 2011 Member No: #615
Location: Groesbeek |
When loosing your harddrive you may re-initialize with a new memory card and your 6.63 CD. Start-up the system and short-cut the restart and it will do the rest. Afterwards you have to reload the maps. You also have to update the config file with the car setting by using eg MIRASCRIPT or using LEXIA |
||
|
|
|
||
 User Colour Key: User Colour Key:Head Administrator, Administrator, Technical Expert, C6 Premier Discount Club |
|