| C6owners :: Forums :: C6 Support :: The Garage |
<< Previous thread | Next thread >>
|
Drivers heater flap guide? |
    Please Register to enjoy additional Member Benefits |
| Author | Post | ||
Leobx16v
 
|
|
||
   Member No: #2090
Location: Blackpool |
as above has anyone made a guide for this or do i make one while im doing it? just thought id ask as its a bit more complicated to do than the passenger side and mines gone, ive tried to look for a guide for the drivers but (i admit) i didnt look that hard 
|
||
|
|
|||
|
Cisco
|
|
||
 Member No: #1429
Location: Glasgow |
Hi Leo, The important bit is on page 3 of this thread showing the best cutout shape. It was posted by JimC. - Click Here - All the best Frank |
||
|
|
|
||
|
Leobx16v
|
|
||
|
Member No: #2090
Location: Blackpool |
right well i'll do an in detail guide to the drivers side, stripping all the stuff off etc | ||
|
|
|
||
|
e3steve
|
|
||
  Member No: #1163
Location: Warsash, Hants & Palma de Mallorca, Spain |
I went in, following Jim’s rough guide, and found it quite easy. I used a vibrating multi-tool, aka ‘vibra-saw’ or (in Spain) ‘Fein saw’ (brand name). Getting the driver’s knee panel out can be a bit tricky, but I’d had that off before so knew my way around there a bit. Some hidden screws — don’t forget those in the middle of the trinket drawer’s rubber buffers — and there’s a couple behind the chromed trim(s), I think, each of which [the trims] must be prised out. The knee airbag has a couple of 10mm nuts that are accessed once the felt panel above the foot pedals is removed (two plastic quarter-turn buttons, one each side of the footwell light). The side panel, incorporating the passenger’s airbag keyswitch, just pops out, much like the left side one does in order to drop the glove box out. |
||
|
|
|
||
|
Leobx16v
|
|
||
|
Member No: #2090
Location: Blackpool |
yeah i've done it, but i was asking to see if a guide was needed because of the strip down needed to get to the heater box. i will be making a guide shortly for anyone wishing to attempt it. | ||
|
|
|
||
Frode

|
|
||
|
Member No: #3171
Location: Bergen |
Hi all, My first post, this. I hope it is ok to add a question to this thread, as my problem is related. I have discovered that the right side heating (LHD car, so no airbag issue) is not working. It provides lukewarm air at the best. The left-hand side is warm. However, the mixer flap (right hand side, lower of two flaps from the drawings I have seen) seems fine from the outside, it turns through about 90 degrees and nothing seems loose. The motor also moves. When adjusting the mixer flap by hand, I get only a very small change in air temperature. I am reluctant to cut out the flap in this instance. Also, if there is a common heating radiator for the two sides (?), it cannot be air trapped anywhere. Can it then be something wrong with a temperature sensor - I guess there is one for each side? Nothing happens if I put the right hand temperature to "HI", by the way. Grateful for any advise, Best, Frode Bergen, Norway C6 Excl.2.7, 2007. |
||
|
|
|
||
travlician

|
|
||
 Member No: #350
Location: Paradera |
I exprienced (LHD car) that when gas level is low, the passenger (right) side is not getting cold air while the driver side does. So maybe check that first. | ||
|
|
|
||
|
Frode
|
|
||
|
Member No: #3171
Location: Bergen |
Thank you for the suggestion! However, I think I found the solution while running DiagBox today. The mixer motors seemed to be working ok, but I noticed that the position of the motor when at 100% (maximum warm air) did not align with the position of the flap when it gave the warmest possible air. Further manual moving of the flap showed that I COULD get warm air sometimes - when I did not press the flap inwards while trying to turn it. Thus I conclude that the flap is indeed the culprit, but in this case it is warped, and not totally broken. Time to order a new flap, I think. Cheers, Frode |
||
|
|
|
||
|
Frode
|
|
||
|
Member No: #3171
Location: Bergen |
Hi, A short update. I drilled an inspection hole (approx. 18mm) inboard of and level with the axis. There I could see that the flap was broken, but it still stood in place, and the two parts seemed to be hanging together either by luck or by some thread of intact plastic. I could move the axis so that it aligned correctly with the flap, and could do a repair through the hole (which I expanded somewhat). I tried plastic welding glue after warming up the flap with a hair dryer through the hole. The repair holds for now! I do not have high hopes for this simple repair, but I can always go for the change-flap option later. The hole was plugged with a rubber sealing plug from a Citroën DS. This makes me a bit happier about the whole business! Best, Frode |
||
|
|
|
||
|
Hattershaun
|
|
||
 Member No: #320
Location: Bedfordshire, UK |
Here's a picture of the replacement flaps with Citroën part number 6480E3. The new flaps have a reinforced shaft compared to the original flap. In my picture of old and new flaps you can see where the old flap has broken along it’s shaft. |
||
|
|
|
||
|
Hattershaun
|
|
||
|
Member No: #320
Location: Bedfordshire, UK |
Photo didn't attach! | ||
|
|
|
||
|
David Hallworth
|
|
||
   Member No: #90
Location: Glasgow |
Picture: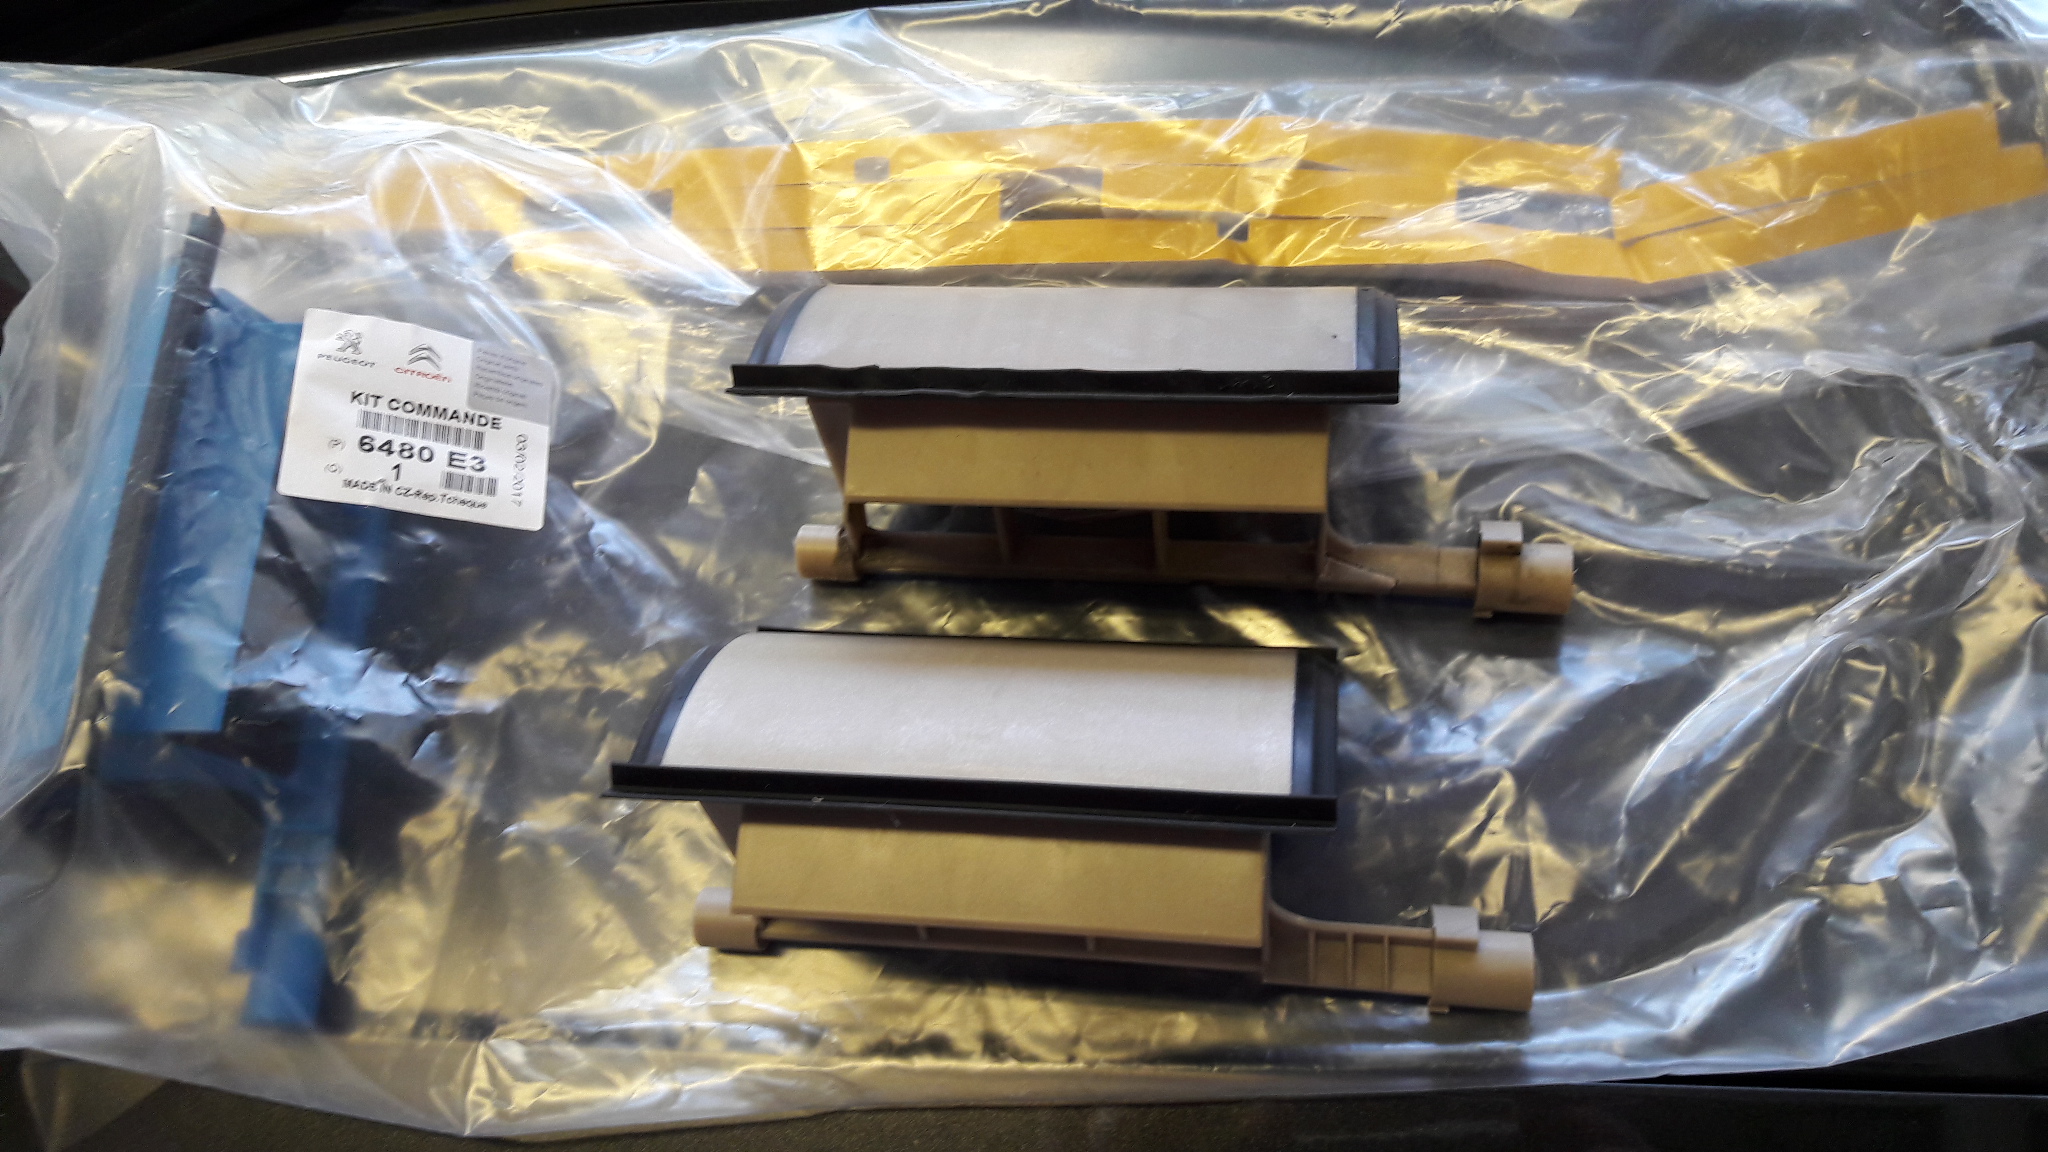 |
||
|
|
|
||
 User Colour Key: User Colour Key:Head Administrator, Administrator, C6 owner, Technical Expert, C6 Premier Discount Club |
|
Privacy Policy | Cookie Policy | Site Disclaimer | Contact Details | Warranty | Sitemap | C6 Insurance | Quick Facts | Re Call Info | Downloads | Error Codes
| Site and Graphics created by: C6Dave Forum Icons by Axialis Emotes by Seb | 
|

