| C6owners :: Forums :: C6 Support :: The Garage |
<< Previous thread | Next thread >>
|
[%*^#@!] ball joints again |
    Please Register to enjoy additional Member Benefits |
| Author | Post | ||
gmerry
 
|
|
||
   Member No: #21
Location: Scotland |
Hi, I've attached a photo of a Peugeot 407 lower wishbone (same design as C6). The main pivot bush (circled in red in the photo) appears to be bonded to a metal sleeve which in turn is pressed into the wishbone arm. Is this bush and sleeve the one that is now available as a spare? Any ideas on how the old sleeve is removed from the suspension arm. I know from work on classics that often the rubber part is burnt out with a torch, the old sleeve has a radial cut (or two) and the new sleeve complete with new rubber bush pressed in. I'm guessing this might take 20-30 Tonnes of press force, anybody done this. Regards G 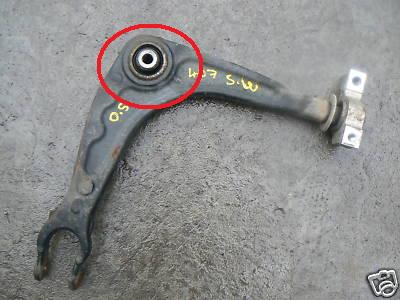
|
||
|
|
|
||
nickyg

|
|
||
 Member No: #100
Location: Tyrone |
Phil, nice one! .... I had just popped on here to post that very info! I'm gearing up for a big overhaul and was pleasantly surprised to find there was a possible solution in these parts, negating the need to bin the wishbone (as you mentioned) over that rear bush. Gmerry, I'm quite certain the centre bush you enquired about is listed as a part number on the suspension diagram, wheras the rear bush is not. A word of caution, though, I note another Irish forum member acquired the rear bush from a parts supermarket a while back but found the dimensions were not quite identical and had to fashion small spacers to bring it right. (edit: sorry, he's been here in person earlier today to share that experience!)  If I get to it before someone else does, will certainly let you all know if these particular afermarket rear bushes are identical or not. Nick |
||
|
|
|
||
Gobxoy

|
|
||
  Member No: #786
Location: Essex |
gmerry When I part owned a garage, we would use a 20ton press. Getting them out is slightly more difficult than pressing them in, have used a large vice as a press,,,,,,,, (WARNING CAN B%*//ER the vice screw thread.) Can burn them out and then chisel the steel out by defoming it enough to drop out. (your a smart guy so expect you knew or worked out) You could also get a hole saw and drill out the rubber part, and then chisel, I have seen putting a hacksaw cut, in the remaing steel, being carefull not to cut the wishbone, it't not nessasary to cut the steel right though to wishbone anyway just enough to weaken it for chiseling. Hope this helps???? if not no harm done??????  |
||
|
|
|
||
|
gmerry
|
|
||
|
Member No: #21
Location: Scotland |
Hi, a summary and some further information:- Quinton Hazel (QH) list part numbers EMS8315 for the Lower Wishbone front flexible mount and EMS8314 for the Lower Wishbone rear flexible mount (the one inside an aluminium carrier). In the QH catalogue, there are no photos of either part so anything returned on a google search will just be a sub for a different part and will look wrong. The QH catalogue lists the OEM part numbers as the entire wishbone, complete with front and rear flexible mounts, specific to left and right fitment. This is consistent with PSA not offerring these flexible mounts as separate spares. Keep in mind that the wishbones complete are not that expensive in absolute terms. Certainly the cost of removing the old mounts, cleaning up the wishbones and pressing in new mounts would exceed the cost of a new wishbone if paying Citroen dealer prices for the labour. Personally I like the "green" aspect of just replacing the worn out part. Look forward to some photos and dimesnions of the parts, plus a write up on the job of removing, refurbishing and replacing these wishbones. Regards G |
||
|
|
|
||
citrohanc6

|
|
||
 Member No: #329
Location: utrecht |
gmerry wrote ... Ball Joint now fitted complete with grease fitting. So long as this in the bottom centre and facing either forwards or backwards there is plenty of room for the grease fitting and access to get the gun connected. Regards G 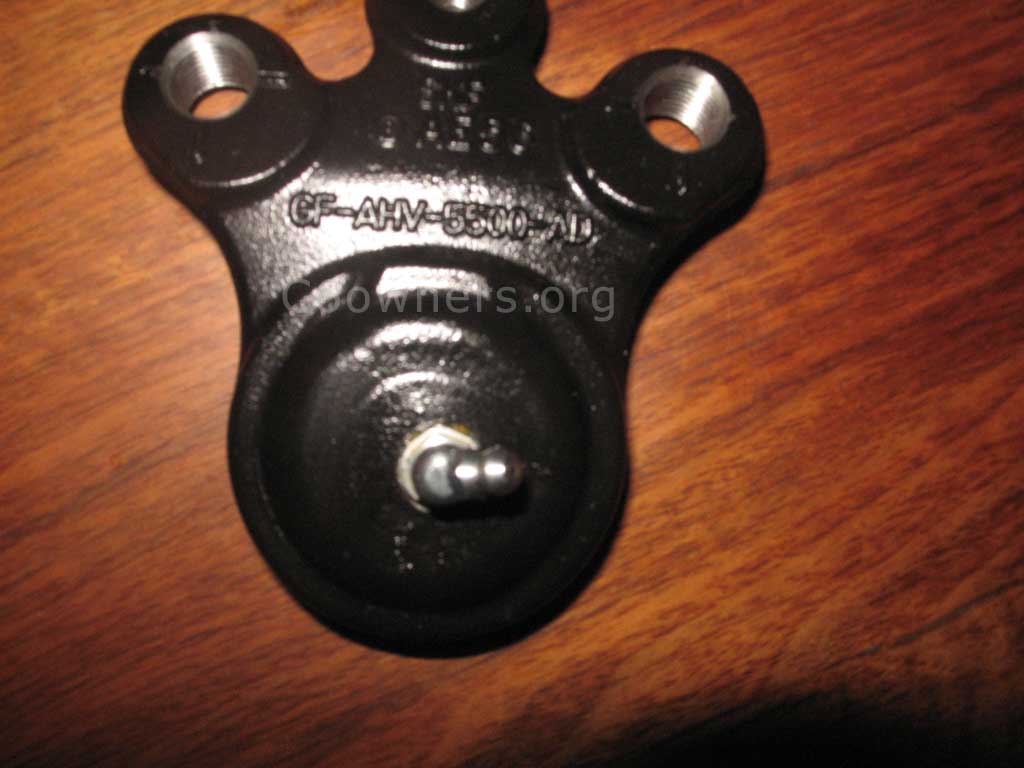 Gerry, I'm considering grease nipples also: Did you fit this ball joint with a socket over the grease nipple and a hammer to tap the item on the spigot? What puzzles me is the building-up of pressure once one uses the gun. Will it shot the seal on top of the bearing What is your experience? (Ordered the joints saterday) Regards Winus |
||
|
|
|
||
|
gmerry
|
|
||
|
Member No: #21
Location: Scotland |
Winus, assuming like me, the ball joint is modified on the bench rather than on the car:- 1/ machine flat/recess in outside centre using a 13mm milling cutter 2/ machine a through hole 9.5mm (from memory) using a milling cutter so there is no swarf, just a disk. However a spot of grease on the inside will catch that, remove with clean rag 3/ insert and peen the inside of the nutsert, using a ball bearing and clean piece of steel rod. 4/ degrease outside area, screw in the m6 grease nipple checking alignment forward, glue in place with loctite 5/ using clean needle, prick grease seal in say 3 places but not up against side nearest disk (otherwise one will get a load of grease on the brake disk) Regards G |
||
|
|
|
||
|
speedfix
|
|
||
|
Member No: #1043
Location: south west |
"To replace the pivot bearings, it's probably possible to do the job without removing the brake caliper and disc but I would strongly recommend that the brake disk is removed as part of the job, it vastly improves access. The drive shaft nut must be undone so that the pivot and hub can be swung outwards. This required a 32mm socket. I use a single hex socket with a 3/4" drive and breaker bar plus about a 5 foot long bar. You also need a reaction bar that bolts onto the hub." To replace the bottom pivot joints the above IMO is like using a sledgehammer to crack a nut. For those that choose the time consuming way of fitting a nipple with the Rivet bushes this may well help to lesson some time. First with the road wheels on the ground and holding the foot brake on undo the drive shaft nuts. No need for the torque reaction arm etc! Lift the the car remove the wheels and tap the drive shaft inwards. Remove the two torx set bolts that hold the brake disc to the drive flange. Remove the three torx set bolts that hold the pivot to the hub, remove the bolt that holds the bottom arm to the hub. Move the bottom of brake disc outwards. Leave the abs sensor in place, they are mostly damaged if removed. The hub can now be moved outwards and the pivot joint can be removed by just pulling it off. The collar can be removed by using a dremmal and carefully grinding a small grove, with a gentle tap with the blunt chisel will let it free and drop off. Fit the new joint to the hub with the rivet bush nipple but be very careful not to tap the area by the rivet. Once fitted to the hub spigot carry out in the reverse order as it came apart. You may like to fit the quick method of the interference nipple! S. |
||
|
|
|
||
|
C6Dave
|
|
||
  Member No: #1
Location: Northumberland |
If the issue is water ingress and your going to the trouble of adding a grease point then maybe you should be using something like Quicksilver 2-4-C which is highly water resistant Marine Grease - Click Here - I have just bought some for the Traction steering joints etc. from my local boat chandlers. |
||
|
|
|
||
|
gmerry
|
|
||
|
Member No: #21
Location: Scotland |
Hi all, I've just injected some fresh Gearbox Oil (80w) into the lower front suspension joints using the previously fitted grease zerk fittings. By the way, I'm not saying grease is bad and heavy oil is good: I just happen to have a special oil injection gun. There was no sign at all of any corrosion products being discharged with the oil that came out of the joint so it appears the combination of the seals and a joint full of oil is preventing any internal corrosion. Regards G |
||
|
|
|
||
|
cruiserphil
|
|
||
 Member No: #38
Location: Celbridge |
Lads, Fortunately no lower swivel bearing problems at the moment, but found an interesting bulletin against the part on the Firstline website. I'll arrange with C6Dave to upload it. Regards, Phil C. |
||
|
|
|
||
|
C6Dave
|
|
||
|
Member No: #1
Location: Northumberland |
Bulletin is here: - Click Here - It simply a description of the differences as seen below: 
|
||
|
|
|
||
|
markp
|
|
||
 Member No: #1746
Location: Somerset |
For the record: I'm just getting my hub carriers replaced with the upgraded design that protects the lower swivel joints better. More info in this thread: - Click Here - Cheers, Mark |
||
|
|
|
||
ul9601

|
|
||
|
Member No: #1975
Location: Auckland |
Hi guys, What is the consensus on the FRIP issue - I know the discussion has been going on for a few years, there are proponents for installation of grease nipple on older design FRIP and others going with the complete improved design swivel assy instead. I'm kind of in between situation, as I had a whole bunch of jobs done on front suspension (rear bush replacement on both sides and O/S FRIP) only 1 1/2 year ago. So I'm inclined to replace N/S FRIP only and possibly incorporate the grease nipple mod. Any long term feedback would be appreciated if I need to bother with it. I've read some posts (by speedfix, for one) that it's a waste of time but that's just one man's opinion. |
||
|
|
|
||
Go to page <<
|
|
 User Colour Key: User Colour Key:Head Administrator, Administrator, C6 owner, Technical Expert, C6 Premier Discount Club |
|
Privacy Policy | Cookie Policy | Site Disclaimer | Contact Details | Warranty | Sitemap | C6 Insurance | Quick Facts | Re Call Info | Downloads | Error Codes
| Site and Graphics created by: C6Dave Forum Icons by Axialis Emotes by Seb |  |


