| C6owners :: Forums :: C6 Support :: The Garage |
<< Previous thread | Next thread >>
|
SWIRL flap actuator repair |
    Please Register to enjoy additional Member Benefits |
| Author | Post | ||
vaho
 
|
|
||
  Member No: #2228
Location: Tallinn |
Hi all. Maybe you already know this but nevertheless. I think many of us are driving around completely oblivious of the fact that the SWIRL actuators are shot. I had a throttle response issue, meaning that the acceleration from standstill could be better and smoother. There was nothing major wrong with it, I just felt that it must be better. Inspected and gathered the information and indeed, one of the swirl flap actuator rubber membranes had a crack so the both flaps didn´t move at all when they should move if throttle is applied. The fix is easy and inexpensive so why not to check it. The result is much improved and smoother throttle response. Before it was 1-2-3-go, now it is 1 and go. Here is a how to pdf file: https://www.dropbox.com/s/hast371l5uz0s9g/C6%20swirl%20actuator%20repair.pdf?dl=0 Best Regards Vaho |
||
|
|
|||
321dave

|
|
||
  Member No: #614
Location: Dublin |
Another brilliant PDF Vaho, thank you again. I've already changed all the little plastic pipes up to that point. I spent €150 on new pipes and valve assembly. But now, when I think it didn't really improve anything. Now I think we know why. Thanks again for the PDF. |
||
|
|
|
||
|
321dave
|
|
||
|
Member No: #614
Location: Dublin |
321dave wrote ... Another brilliant PDF Vaho, thank you again. I've already changed all the little plastic pipes up to that point. I spent €150 on new pipes and valve assembly a few months back, I must say I didn't notice much difference with the new versus old setup. |
||
|
|
|
||
e3steve

|
|
||
 Member No: #1163
Location: Warsash, Hants & Palma de Mallorca, Spain |
Outstanding info! Thanks once again, Vaho! Does the kit comprise the parts to repair both actuators? |
||
|
|
|
||
|
David Hallworth
|
|
||
   Member No: #90
Location: Glasgow |
Once again, another cracking guide! Are you happy for us to add this to the Technical Documents section as well? Thanks, David. |
||
|
|
|
||
|
vaho
|
|
||
|
Member No: #2228
Location: Tallinn |
Thank you! Yes you can add it to the documents. Yes Steve, the kit has parts for both actuators. |
||
|
|
|
||
|
vaho
|
|
||
|
Member No: #2228
Location: Tallinn |
Sorry guys, as it turned out the rear actuator is not as easy to do as the front one. I did the front first and thought that the rear is the same but the engine breather valve assembly is on the way. Ideally it should be removed which is not difficult at all though, once the rubber pipes are disconnected, fuel and vacuum lines moved a lttle out of the way it just lifts upwards. The rubber sealing tends to come half way with the assembly so before putting it back check the holes and sealings. This is how it looks after the breather valve assembly is removed, at this point it is even easier to detach and connect the arm as it was in the front. 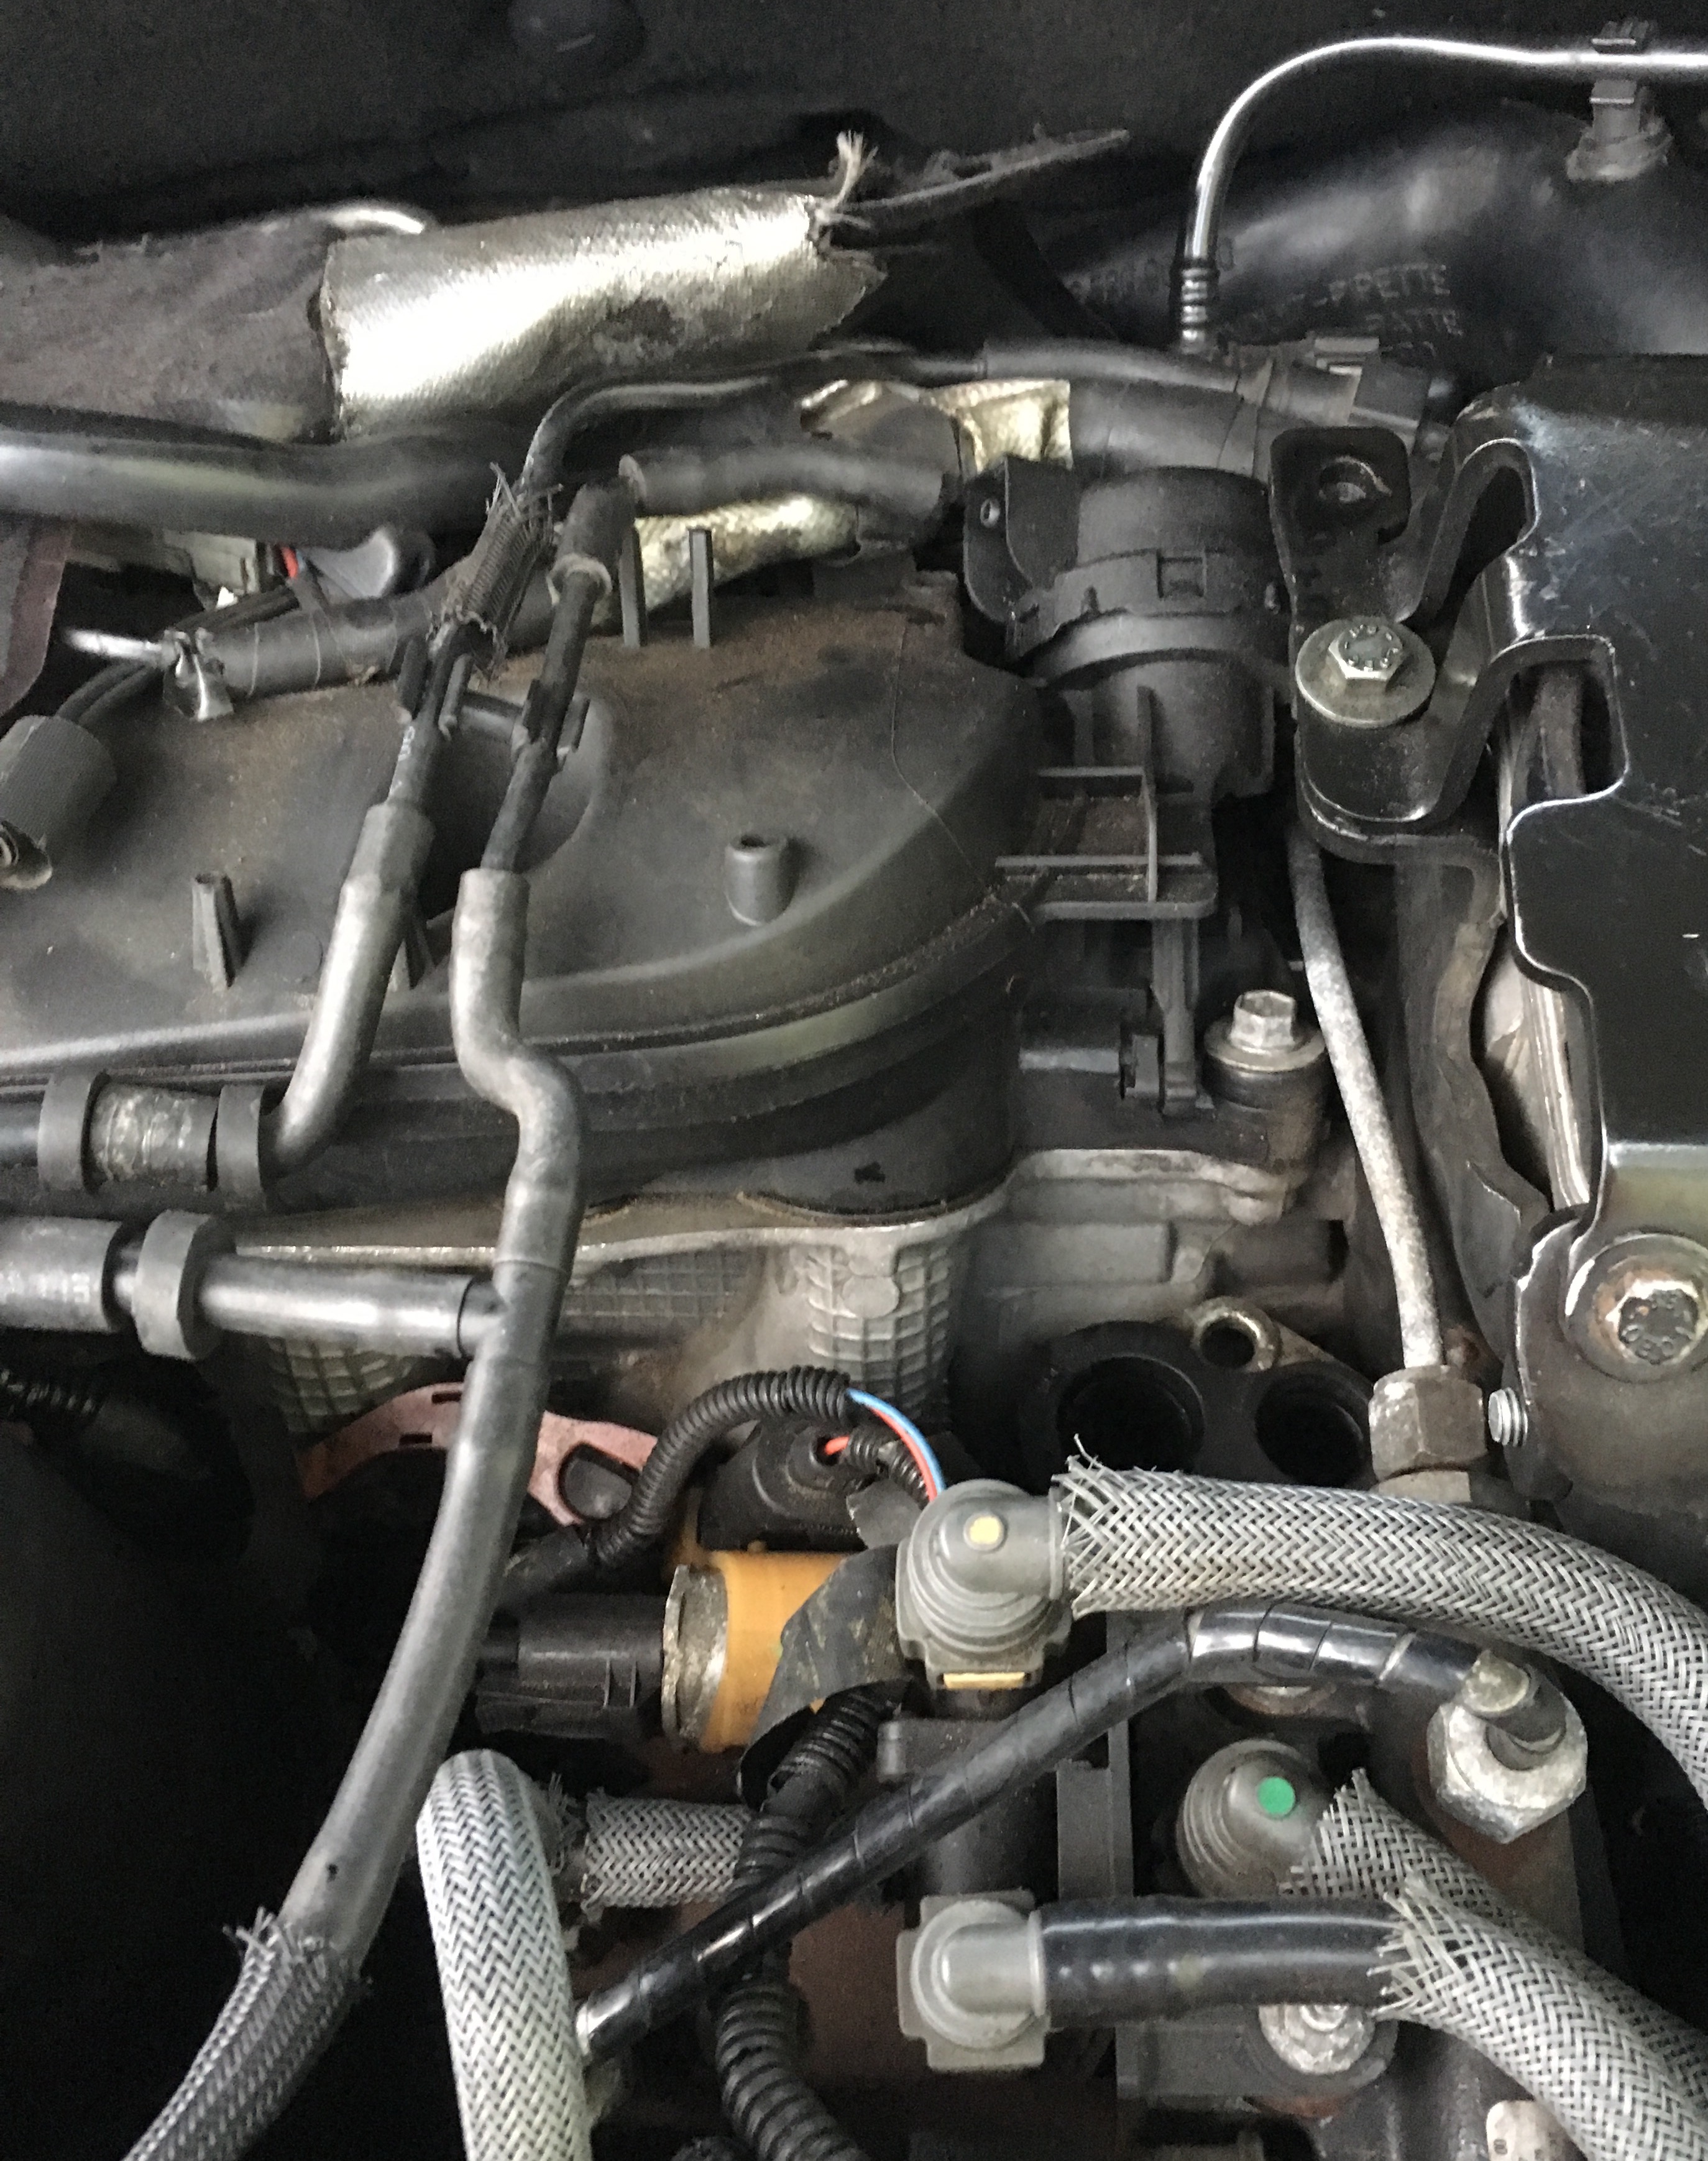 |
||
|
|
|
||
|
321dave
|
|
||
|
Member No: #614
Location: Dublin |
The swirl valve Kit on order now, and will try installing it when i am hopefully fitting my 6 new glow plugs next week. Just wondering how to remove the metal turbo pipe? I've tried before but it wouldn't move for that attempt, even when i removed the little brackets? |
||
|
|
|
||
gmerry

|
|
||
 Member No: #21
Location: Scotland |
Hi Dave, obviously worm drive hose clamps at either end, the little bracket behind/beside the fuel filter and then there is a hidden screw (M8 13mm hex head?) approached sideways from above the fusebox. regards G |
||
|
|
|
||
|
vaho
|
|
||
|
Member No: #2228
Location: Tallinn |
Yes, there is a 13 mm bolt under the metal pipe, around there: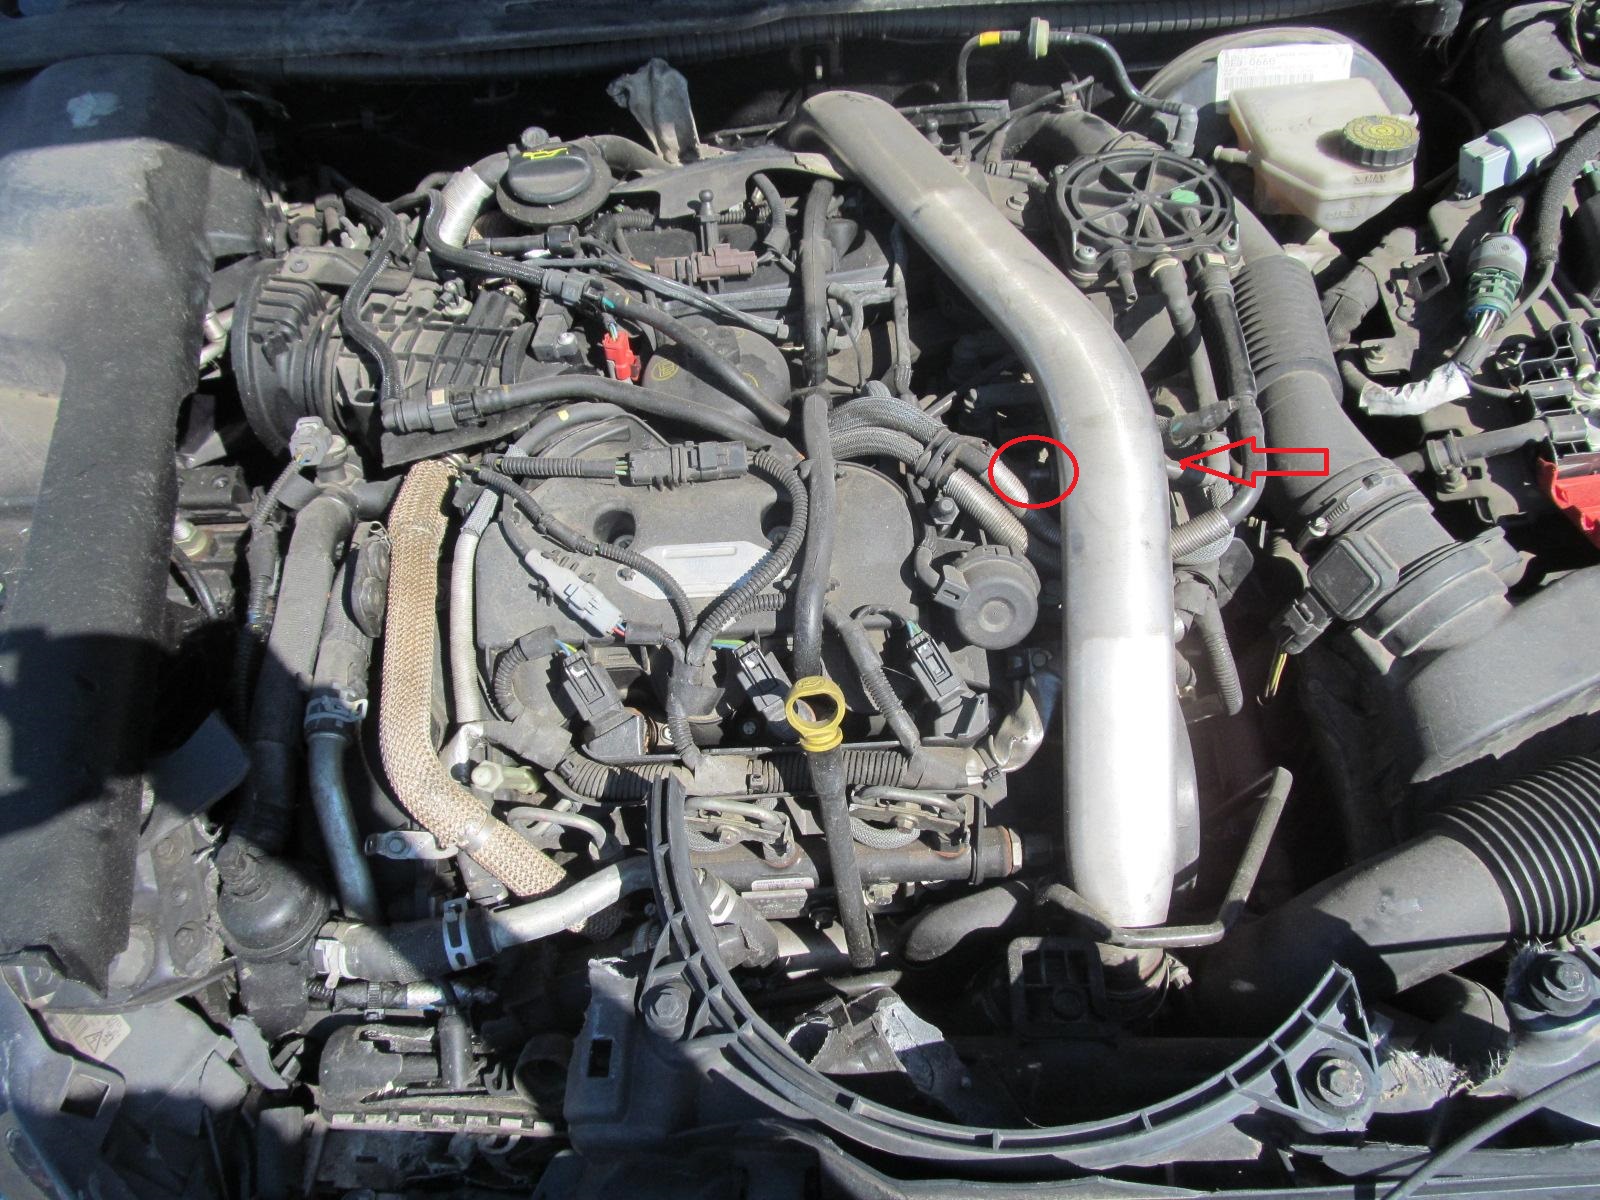 |
||
|
|
|
||
|
321dave
|
|
||
|
Member No: #614
Location: Dublin |
Thanks G and Vaho, will give that a try and hopefully all will go well with the replacement swirl valves. Most of those bits and pieces need to be moved anyway to gain access to the glow plugs as well. Great to get the overlap on the two jobs. | ||
|
|
|
||
|
gmerry
|
|
||
|
Member No: #21
Location: Scotland |
Vaho, trying to spot the difference between my RHD and your LHD. 1/ Brake fluid reservoir is different shape (different master cylinder?) 2/ Air Filter Housing 3/ Air intake thingy above radiator 4/ Missing steel plate above fuel filter (presumably just temporarily removed) regards |
||
|
|
|
||
|
vaho
|
|
||
|
Member No: #2228
Location: Tallinn |
If you referring to the picture above then this is not my car. I just took a random picture from internet, I think it is a Peugeot 607 | ||
|
|
|
||
|
gmerry
|
|
||
|
Member No: #21
Location: Scotland |
That would explain the differences (looks like a very dusty Puegeot) regards |
||
|
|
|
||
|
321dave
|
|
||
|
Member No: #614
Location: Dublin |
Well, picked up the kit on Friday from the local Jagaur/land-rover parts dept. Now the hard bit! Time and patience to fit them, lookin forward to inspecting the current valves rubber parts for any cracks, with my luck regarding engine plastics I'd say they are bad. How many other bits and pieces could be bought from the Jagaur/land-rover parts dept that aren't available from PSA? That would be interesting to know. |
||
|
|
|
||
Go to page >>
|
|
 User Colour Key: User Colour Key:Head Administrator, Administrator, C6 owner, Technical Expert, C6 Premier Discount Club |
|
Privacy Policy | Cookie Policy | Site Disclaimer | Contact Details | Warranty | Sitemap | C6 Insurance | Quick Facts | Re Call Info | Downloads | Error Codes
| Site and Graphics created by: C6Dave Forum Icons by Axialis Emotes by Seb |  |

