| C6owners :: Forums :: C6 Support :: Super Sticky |
<< Previous thread | Next thread >>
|
Practical Advice for Rear EGR Valve Replacement on a 2.7HDi |
    Please Register to enjoy additional Member Benefits |
| Author | Post | ||
gmerry
 
|
|
||
   Member No: #21
Location: Scotland |
Hi all, here's a few tips on replacing the rear EGR Valve on a 2.7HDi 1/ Make sure there is access to the underside of the car - remove undertray. 2/ Remove the air cleaner assembly. Beneath the air cleaner is a hose connection for the coolant circuit held in place by a spring clip. Tie a piece of string along the spring clip (string stops the clip flying off and getting lost) and remove hose, drain coolant about 3 litres into a bucket. 3/ Remove engine trim / sound deadener panel and rear sound deadening over rear bank. Remove the stainless steel turbo air connection pipe out of the way (front flexible worm drive clamp can be undone using a flexible hose clamp screwdriver, the rear using a 1/4" drive socket/ratchet). 4/ The EGR Valve and Cooler has to be removed as a unit. Study the Citroen documents but basically, the following has to be undone:- 3 studs that hold the valve body to the cylinder head 2 screws for the flanged EGR pipe (that leads to the throttle body) 1 screw (10mm hex head) that holds the inlet end of the cooler 1 Clic GR clamp for the inlet connection into the cooler. 2 cooler hoses. 1 electrical connector Note that the top stud has an additional nyloc 10mm hex nut that also holds the turbo air discharge pipe in place. Remove this M10 nut, then push the metal turbo air pipe out of the way. The 3 studs have integral 8mm hex nuts and integral hex is too deep to be accessed using a regular 1/4"socket. Get a special deep 1/4" 8mm socket. Note that replacement studs have a 10mm hex and are much lower on the protruding tip making replacement MUCH easier. The screw that holds the inlet end of the cooler can only be seen/accessed once the cooler hose is out of the way. I disconnected the hose from the fixed metal coolant pipe and left the other end attached to the cooler (better visibility at the fixed metal pipe end but replace the pipe clamp for a sane wormdrive hose clamp) 5/ To make room to remake the connections, especially the CLIC connector, the rear turbocharger air inlet pipe should ideally be removed. This makes the whole job so much easier. Note that the screwed closed Citroen EGR clamps (1628 3J) that fit the rest of the PSA range are to large and do NOT fit). As far as I know, there is no equivalent for the smaller size of CLIC GR clip. The black turbo inlet pipe is held in place by the following:- - a 10mm hex nut below the front of the pipe (just outside the fuel filter) - a hose connection for the drain from the vacuum pump - disconnect this from the vacuum pump end. - working below the car, a 10mm hex headed screw that screws into the turbo charger inlet - see photo. This screw can be accessed from below. Looking up between the two precats, cut off the welded on lugs metal to the exhaust pipe (redundant) and using a special long handed spanner (about 350mm long), undo the M6 10mm hex headed screw. Reassemble in the reverse order! 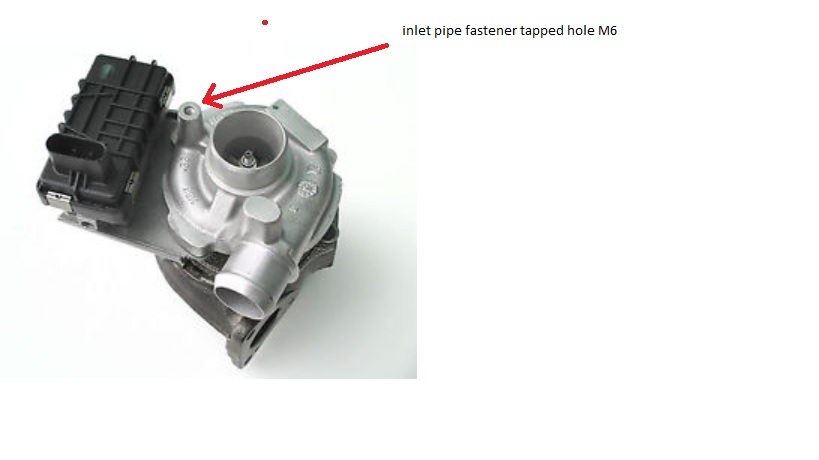 |
||
|
|
|||
|
gmerry
|
|
||
|
Member No: #21
Location: Scotland |
Here's a few extra points. The space between the bulkhead and the EGR cooler to remake the CLIC connection is very small, unless the turbo air inlet pipe is removed. Too small for hands other than finger tips or pliers hence very difficult to position/squeeze the EGR clamp closed. The CLIC EGR clamp actually has a latch, but to use this the clamp needs to be in position before the two pipe ends are made up. In the end, I removed the rear turbo air inlet pipe (JUST MAKE SURE THE VACUUM PUMP DRAIN HOSE IS REMOVED FIRST). The photos show the amount of space this creates and the photo with a mirror shows the connection/clamp prior to be made up. Note that the mirror helps a lot because it is not possible to properly see the connection - camera being quite a lot smaller than my head. The better clamp pliers are the Sealey VS1661 items but these are way too big to fit down the back of the engine so I ended up using the flimsy Sealey VS1664 items. Even these needed the handles bent to a different angle. When using these, you squeeze very hard and try not to think about them snapping in your hand! However they did the job. Regards G 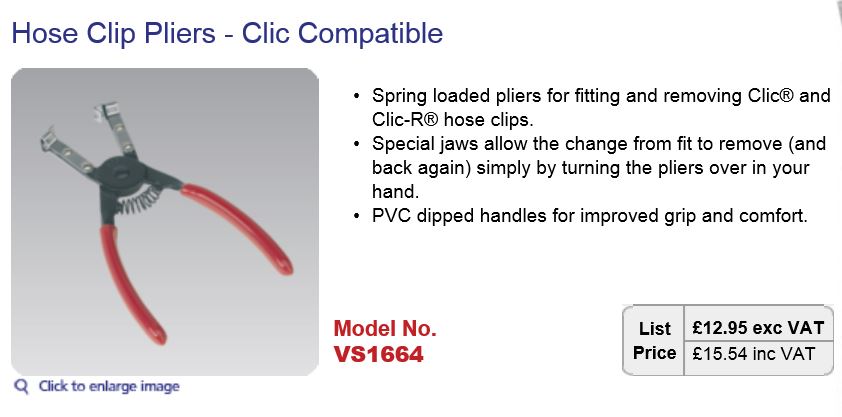 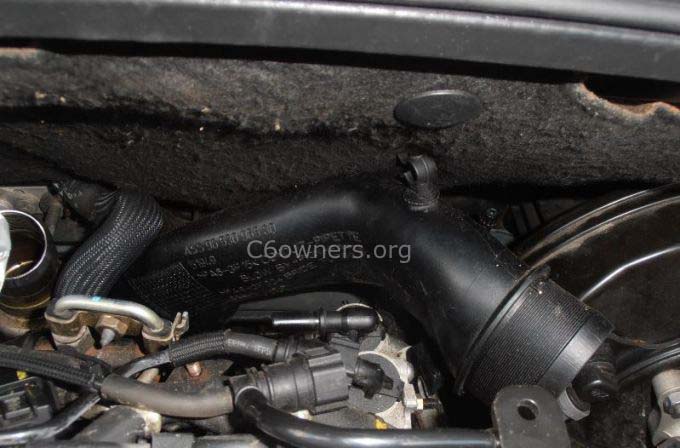 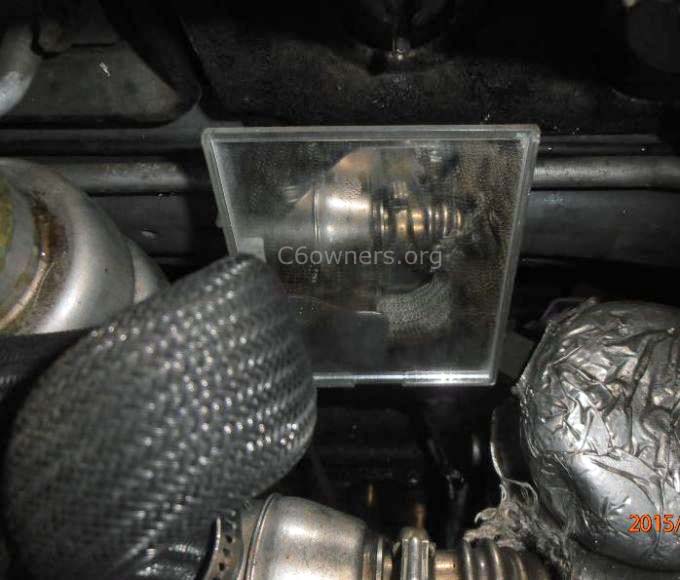 |
||
|
|
|
||
321dave

|
|
||
|
Member No: #614
Location: Dublin |
Hi G, well done! I'm sure those of us who attend to maintenance on the C6 will find this very very useful. I was just thinking about the very same pliers! when you tested your EGR valves recently through Lexia/Diagbox was the click of the solenoid in the EGR valve very audible inside or only with the bonnet open? And do you need the engine running while operating the Lexia test on the valves? many thannks 321dave |
||
|
|
|
||
|
gmerry
|
|
||
|
Member No: #21
Location: Scotland |
Hi 321Dave, the clicks can be heard inside the car if the window is down. They are very noticeable and clearly come from front or rear if the bonnet is up (and engine cover removed). I found that I now can hear the clicking when the ignition is turned off. Regards G |
||
|
|
|
||
|
321dave
|
|
||
|
Member No: #614
Location: Dublin |
gmerry wrote ... Hi 321Dave, the clicks can be heard inside the car if the window is down. They are very noticeable and clearly come from front or rear if the bonnet is up (and engine cover removed). I found that I now can hear the clicking when the ignition is turned off. Regards G Thanks G, I'll have a listen and hopefully all is ok! |
||
|
|
|
||
|
gmerry
|
|
||
|
Member No: #21
Location: Scotland |
Hi all, I used a modified 1/4" drive Stanley Fatmax Rotator ratchet to remove and replace the turbo inlet M6 screw. The modification was to extend to length of the handle to about 350mm The Fatmax can be used as a fine drive ratchet (72 tooth minimum working angle) but where it is useful is the right angle drive aspect so that twisting the handle rotates the fastener. Sometimes this is pretty much the only way to start a difficult to reach fastener! Regards G 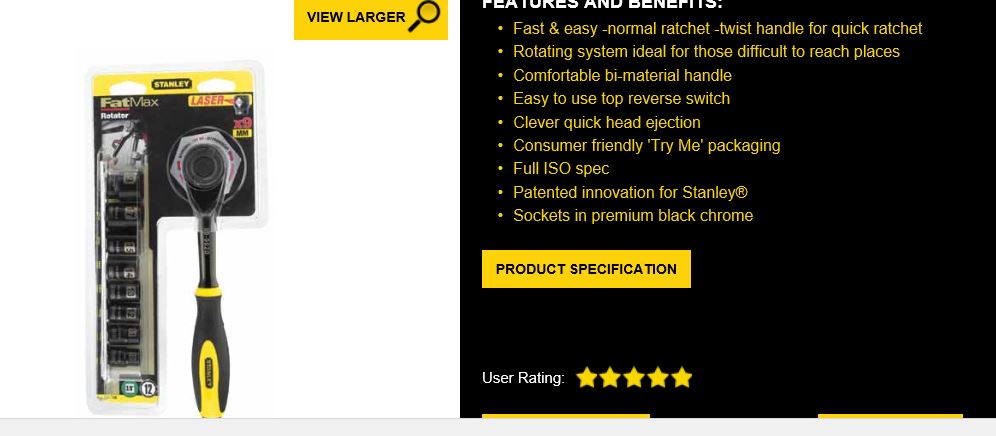 |
||
|
|
|
||
Jodyone

|
|
||
 Member No: #1240
Location: Cornwall |
Looks like I'll be doing this soon...! The rear EGR valve on my car is stuck. There goes another weekend  Thanks in advance for this writeup, Gordon Thanks in advance for this writeup, Gordon
|
||
|
|
|
||
|
Jodyone
|
|
||
|
Member No: #1240
Location: Cornwall |
I did this job earlier in the week. Firstly, thank you to Gordon for the brilliantly useful notes above. All were critically useful. Secondly, you must be something of a zen master! I found this the most unpleasant job I've ever done on a car, a dubious accolade I thought the starter motor replacement had well won. Access is absolutely horrible. I ended up sitting on top of the engine on very thick foam, mindful of the myriad of delicate plastic connectors and so on, doing what is basically keyhole surgery down the back of the engine. A remove-and-refit job that comes down to about five bolts, became -because of the access- about a full day of swearing, mild despair, and let's say my hand-modelling aspirations are on hold until all the scabs drop off. I needed a cable-operated spring clip remover to remove the clips for the hoses. Luckily my mechanic had one and lent it to me. I could in now way get pliers onto them, and consequently those two hoses alone took a few hours to solve. At one point during the refit- I had one pair of those Sealey pliers bent out of all recognition and another pair on standby, and I'd spent the best part of an hour trying to crimp up the world's most hateful fastener- I thought I simply cannot do this, and was calculating how to get the car to a garage. I've never got that despondent before..! To anybody who is patient, small handed, or simply desperate enough to tackle this job themselves, I cannot add much to Gordon's great notes. However, after many attempts to access that bolt that holds on the turbo pipe from underneath the car (impossible, I think, without that specific ratchet, which I don't have), I managed to get on it from above: in the engine bay up to my armpit, but there's just enough space to snake your arm down the back with a 1/4 ratchet, and got on the fastening. By feel alone, of course- you need to inspect from below, to have an idea what you're looking for. Honestly, I'm sick of modern cars for this sort of stuff. I love driving this one but I'd replace it with another 80's Merc if it was practical to do so. In my other car I can sit in the engine bay..!! Anyway all is done, and the hesitation the car always had around 1800 revs has now gone. I'm just hoping the front EGR doesn't go because I don't think I can face it... |
||
|
|
|
||
|
gmerry
|
|
||
|
Member No: #21
Location: Scotland |
Hi Jody, my Zen has just about recovered! Like you, I had to find an operating position on top of the engine, not very elegant. The front EGR is a very different experience... I'd consult with a few mechanics as to their opinion but my take on it would be to remove the bumper, then the radiator and the job would then be a breeze (and probably quicker as well). I did it the hard way with the radiator in place. Regards G |
||
|
|
|
||
vaho

|
|
||
 Member No: #2228
Location: Tallinn |
Thought I share my tips as well. Done this twice now and if you know what you are doing it is not as bad of a job as one might think. The second time took me some 3 hours with brakes and all. It is doable in two also I think. Here are my tips. First: do not buy the cheap EGR-s from ebay or from anywhere else. I bought one and it is the reason why I had to takle the swap twice and now probably have to do it one more time. I bought the EGR valve presumably manufactured in France (doubt it), Qualite Parties. Immediately got occasional judder, MIL and fault code EGR valve stuck. Graphical measurements showed that the valve could not maintain constant position and fluctuated a tiny bit all the time as opposed to the front valve which had a straight line. Here are the physical differences: left one is my old Valeo and the right one is the new but cheaper part. 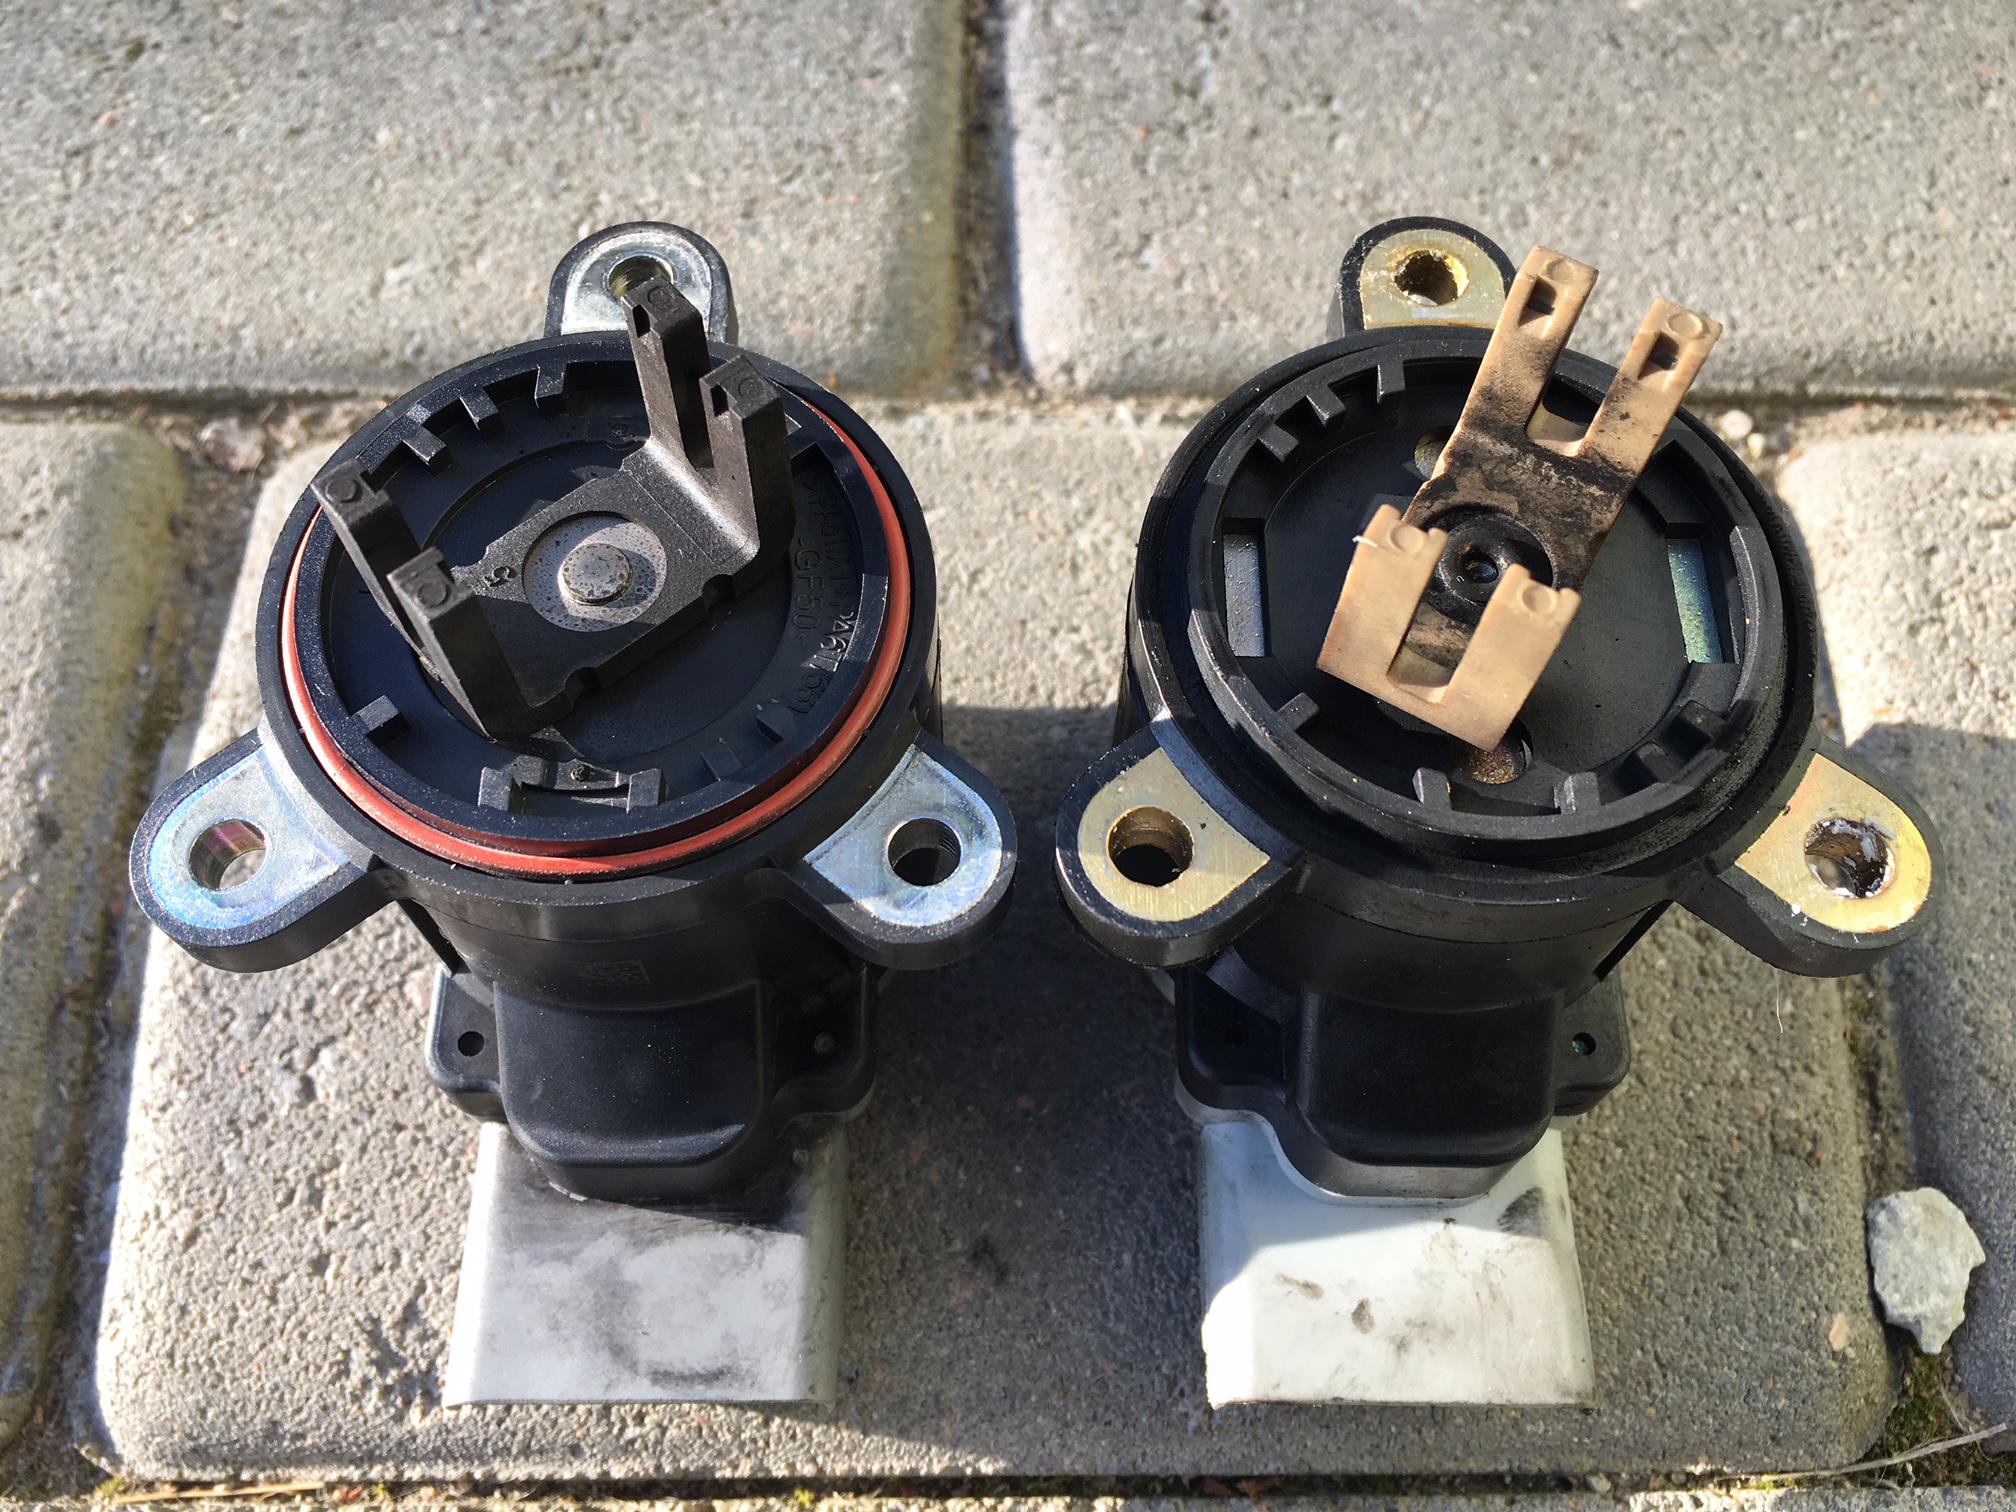 The fork position is different and you can see a soot build up on it. I drove with the valve only some 100 km so the shaft bushing is bad. Also there is no seals whatsoever as Valeo has double sealing. The valve body: 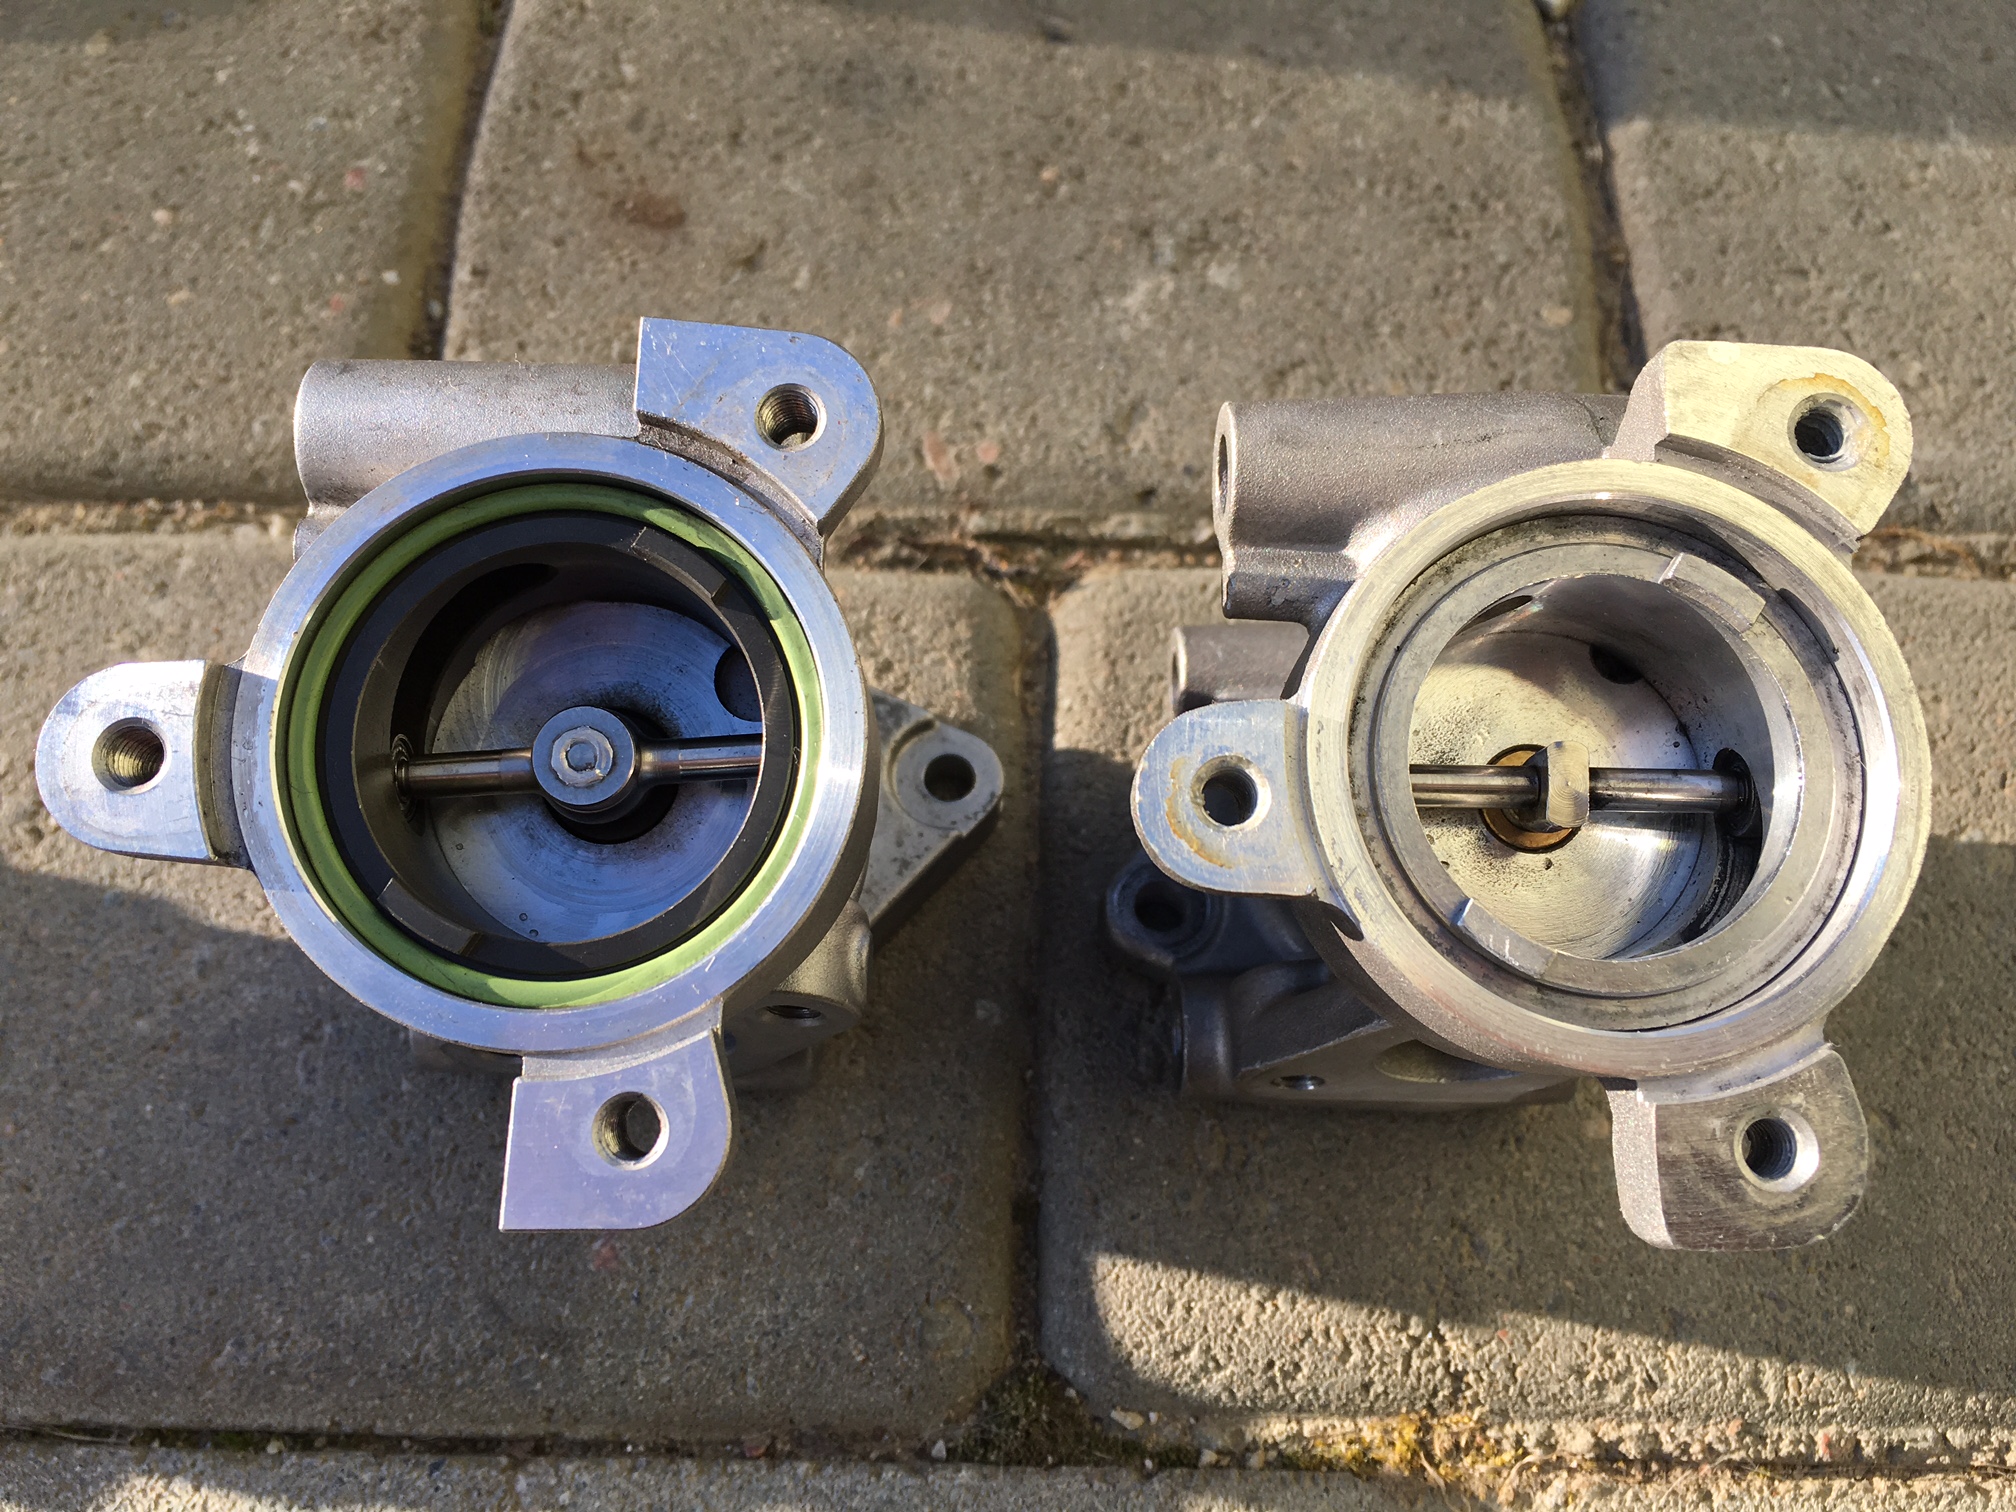 Valeo has plastic guiding ring and the other one has aluminium one and no sealing ofcourse!!? The aluminium ring was responsible for the unpleasant loud metallic clicking during valve engaging after engine shutdown. The other end is not so much different, only the ring on the shaft was a little more closer to the bushing in case of Valeo. 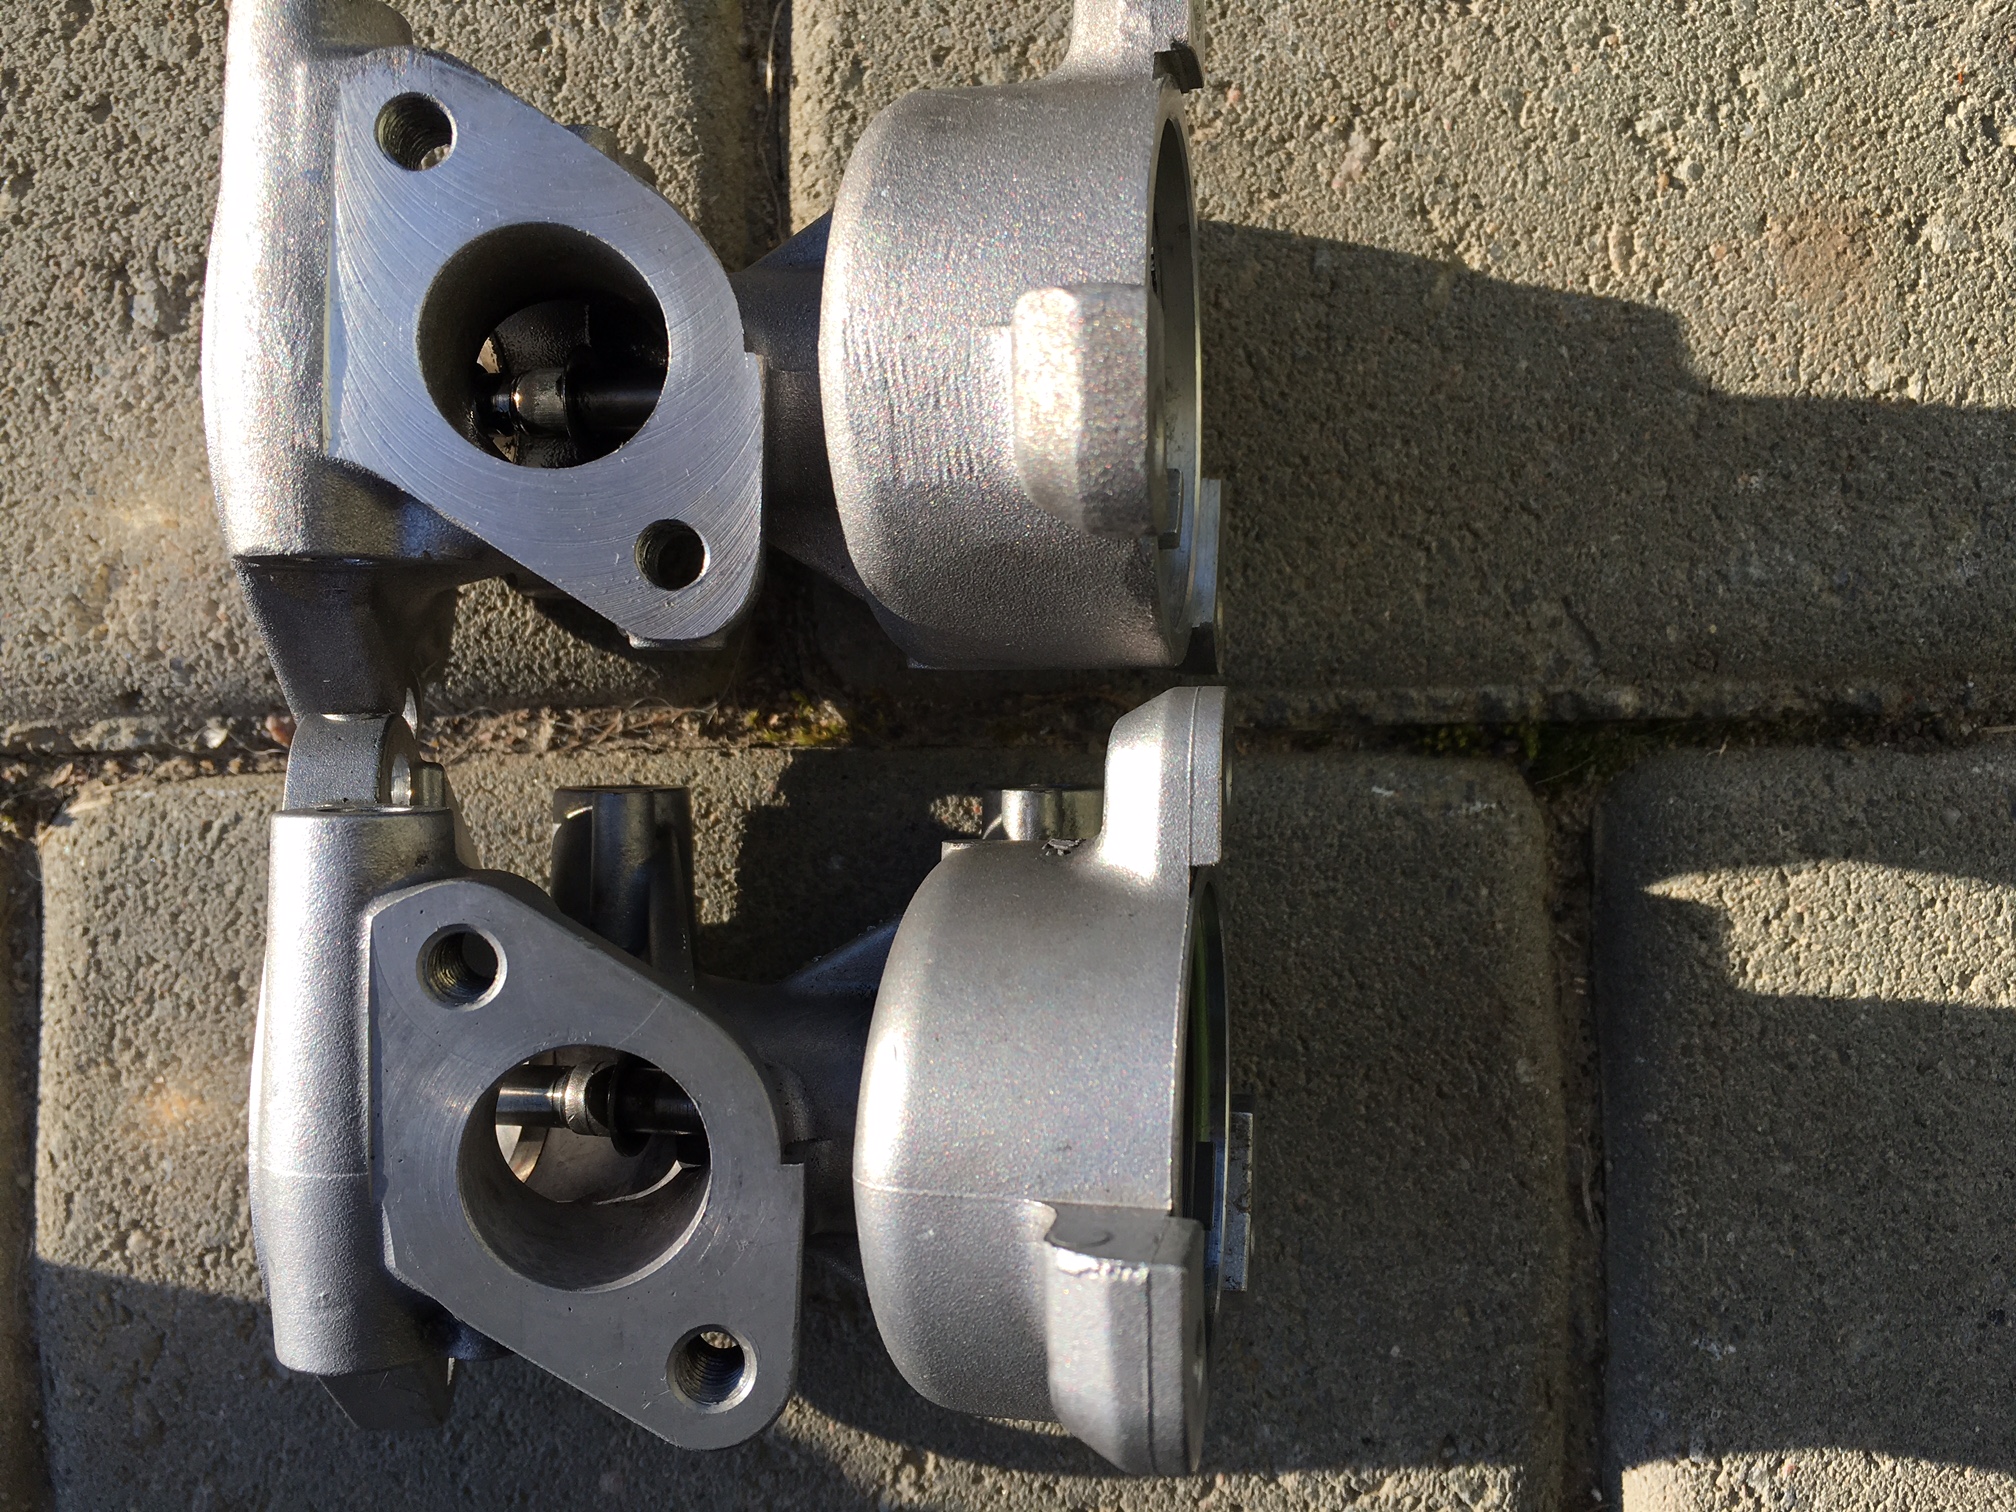 Now to the changing. I removed the air filter housing and drained the coolant from the pipe that feeds the EGR coolers. About 1,2-1,3 liters came out. It is difficult to find a small enogh tank to drain it but basically you can do it with the mug of some sort also. It is possible to control the flow from the disconnected metal pipe by opening and closing the coolant expansion tank cap.  First remove the back vacuum hose from the vacuum pump and brake booster. Just to be sure it doesn´t accidentally brake. Next the 10 mm bolt holding the metal turbo air inlet pipe bracket has to be removed so there is more room for the following.  To access the holding bolt on the inlet side of the cooler (the back side where the Clic GR clip is) I removed the right hose (when facing the car) from the cooler and pushed it aside. Then I could unscrew the 10 mm bolt with an ordinary wrench. 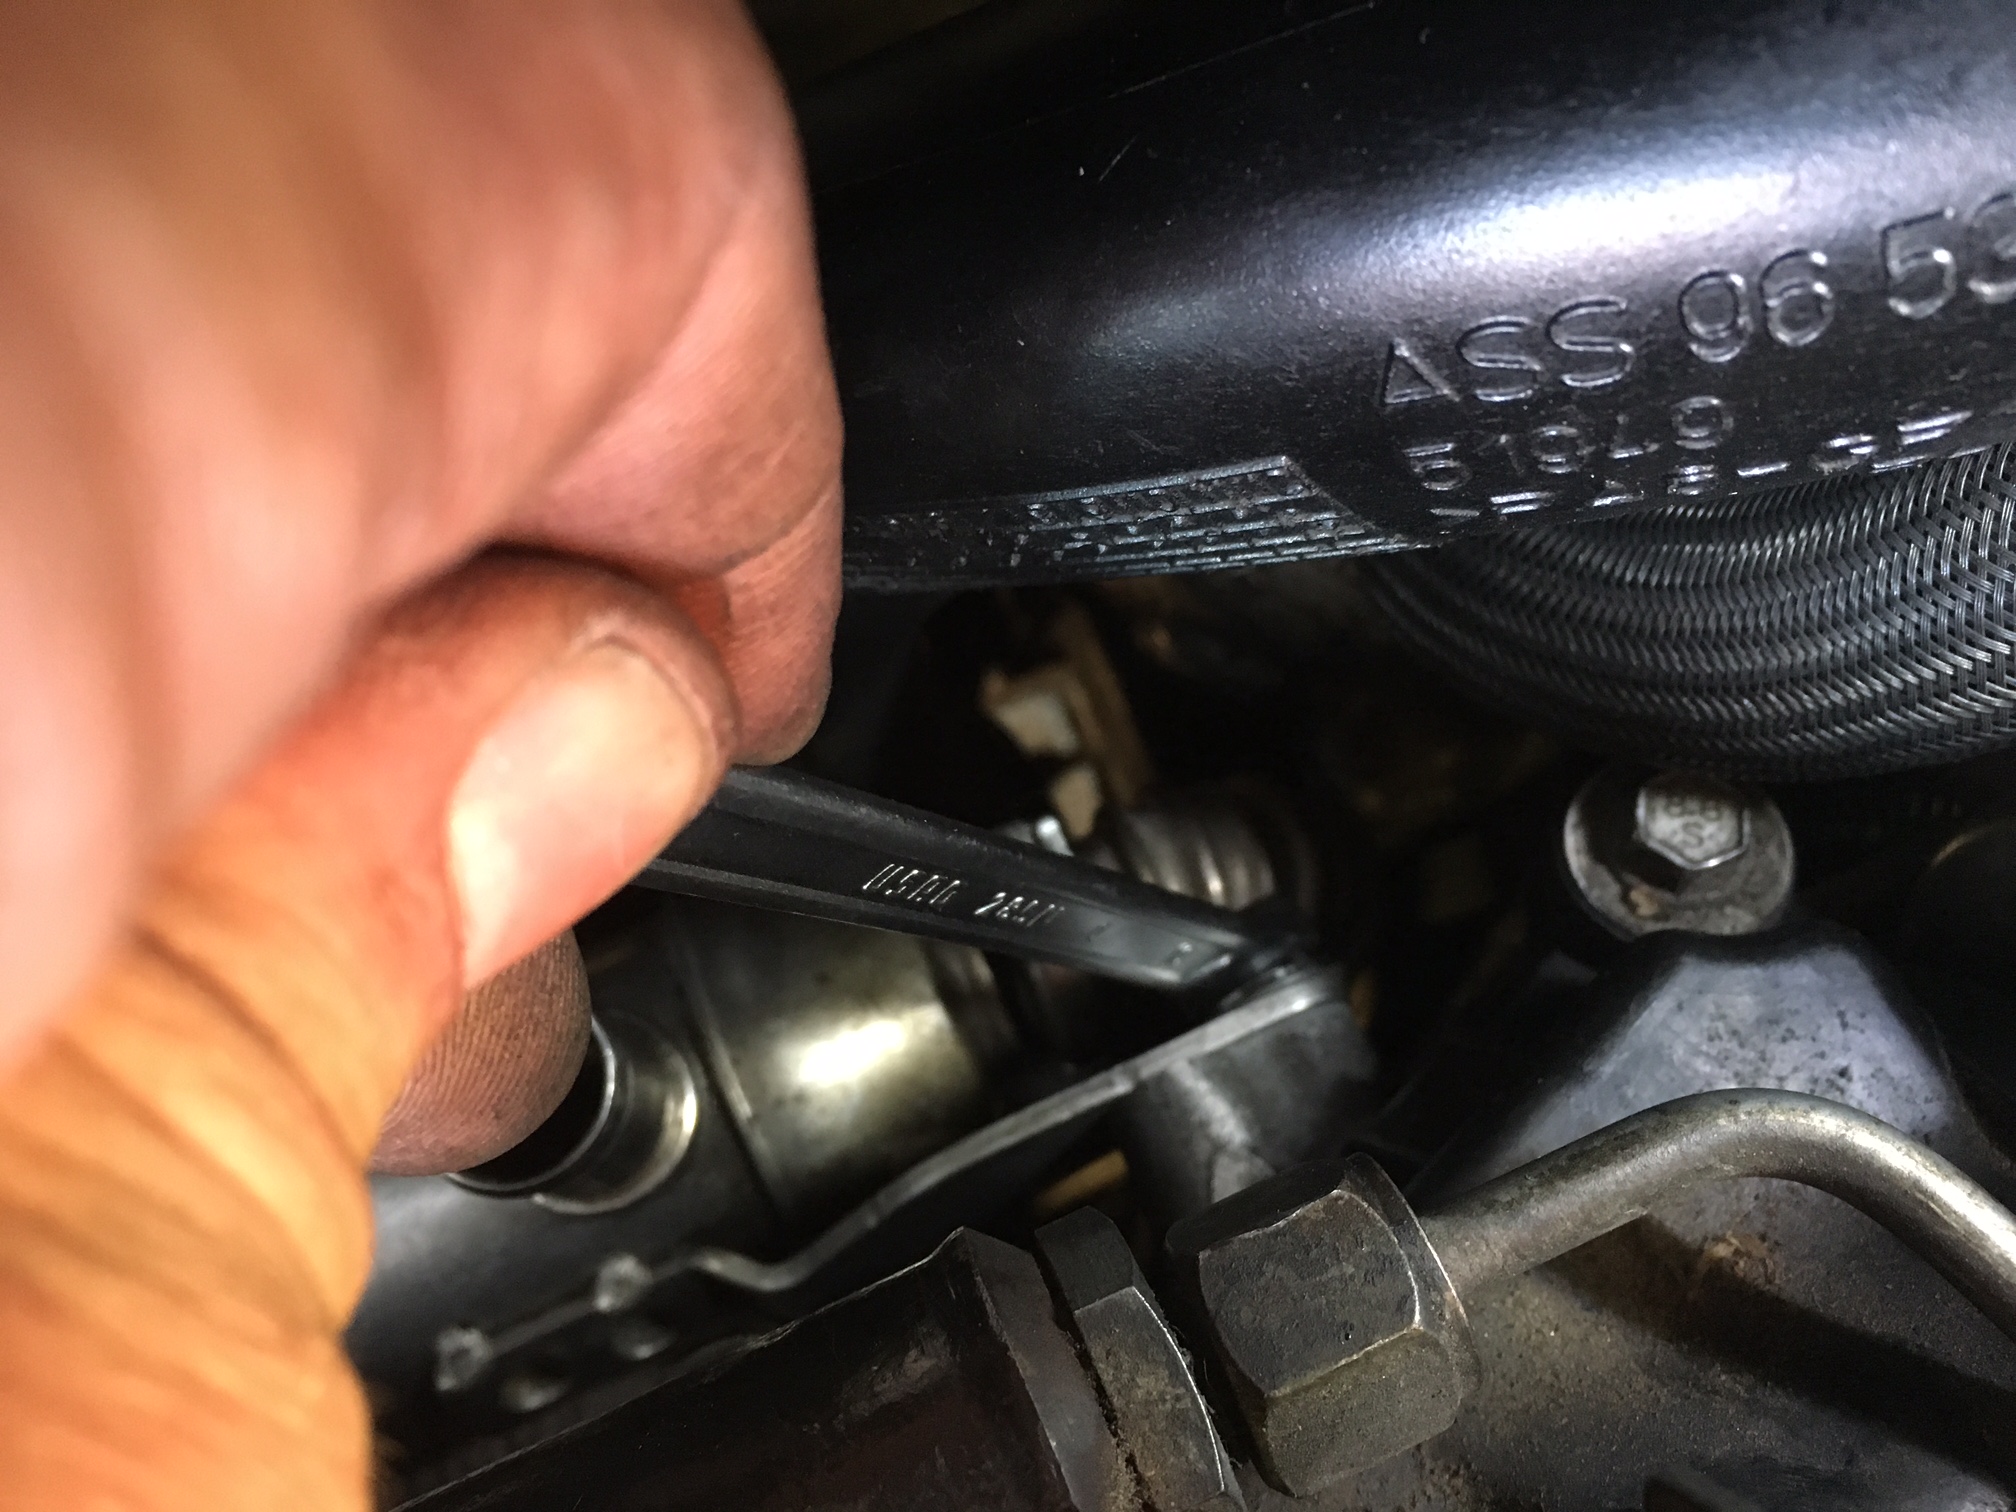 I had worm drive (Jubilee) hose clamps on the coolant hoses already and since they have a hexagonal head it is easy to unscrew them with a 7 mm socket. To be honest I think that the original constant tension hose clamps could be even easier to remove as I have done in other hoses, just squeeze and lift. The Clic GR clip on the inlet opens with screwdriver, just put the tip under the clip and bend it. To unscrew the three 8 mm bolts use a deeper socket as described. It is fairly easy, you just have to put the hand all the way in behind the EGR valve so the socket handle faces downward.  On the previous picture the left coolant hose is removed but it is not necessary, you can remove the valve the hose connected and also you don´t have to remove the outlet metal tube. The tube has to be disconnected from the throttle housing ofcourse, for that I opened the Clic GR clip which holds it to the housing and bent the tube slightly upwards. When the three bolts are removed lift the valve assembly out and disconnect the electrical plug along the way. Before putting the assembly back I connected the outlet metal tube first, It is much easier to do on the bench and also gives a handy way to hold the whole assembly in place and not dropping down during installation. Then put the Clic GR clip onto the inlet tube just as tight as you can move it front and back. Then insert the whole EGR assembly in and try to aligne the inlet tube with the cooler end. Yo can see the spot when you climb onto the front panel and look behind the engine. That done put the three long bolts in and tighten them with hand. Next is the fastening of the Clic GR clip. Put the clip in place and squeeze it as hard as you can. On that point the clip is not moving very much anymore and you can fit the pliers. I used these small pliers with spring: 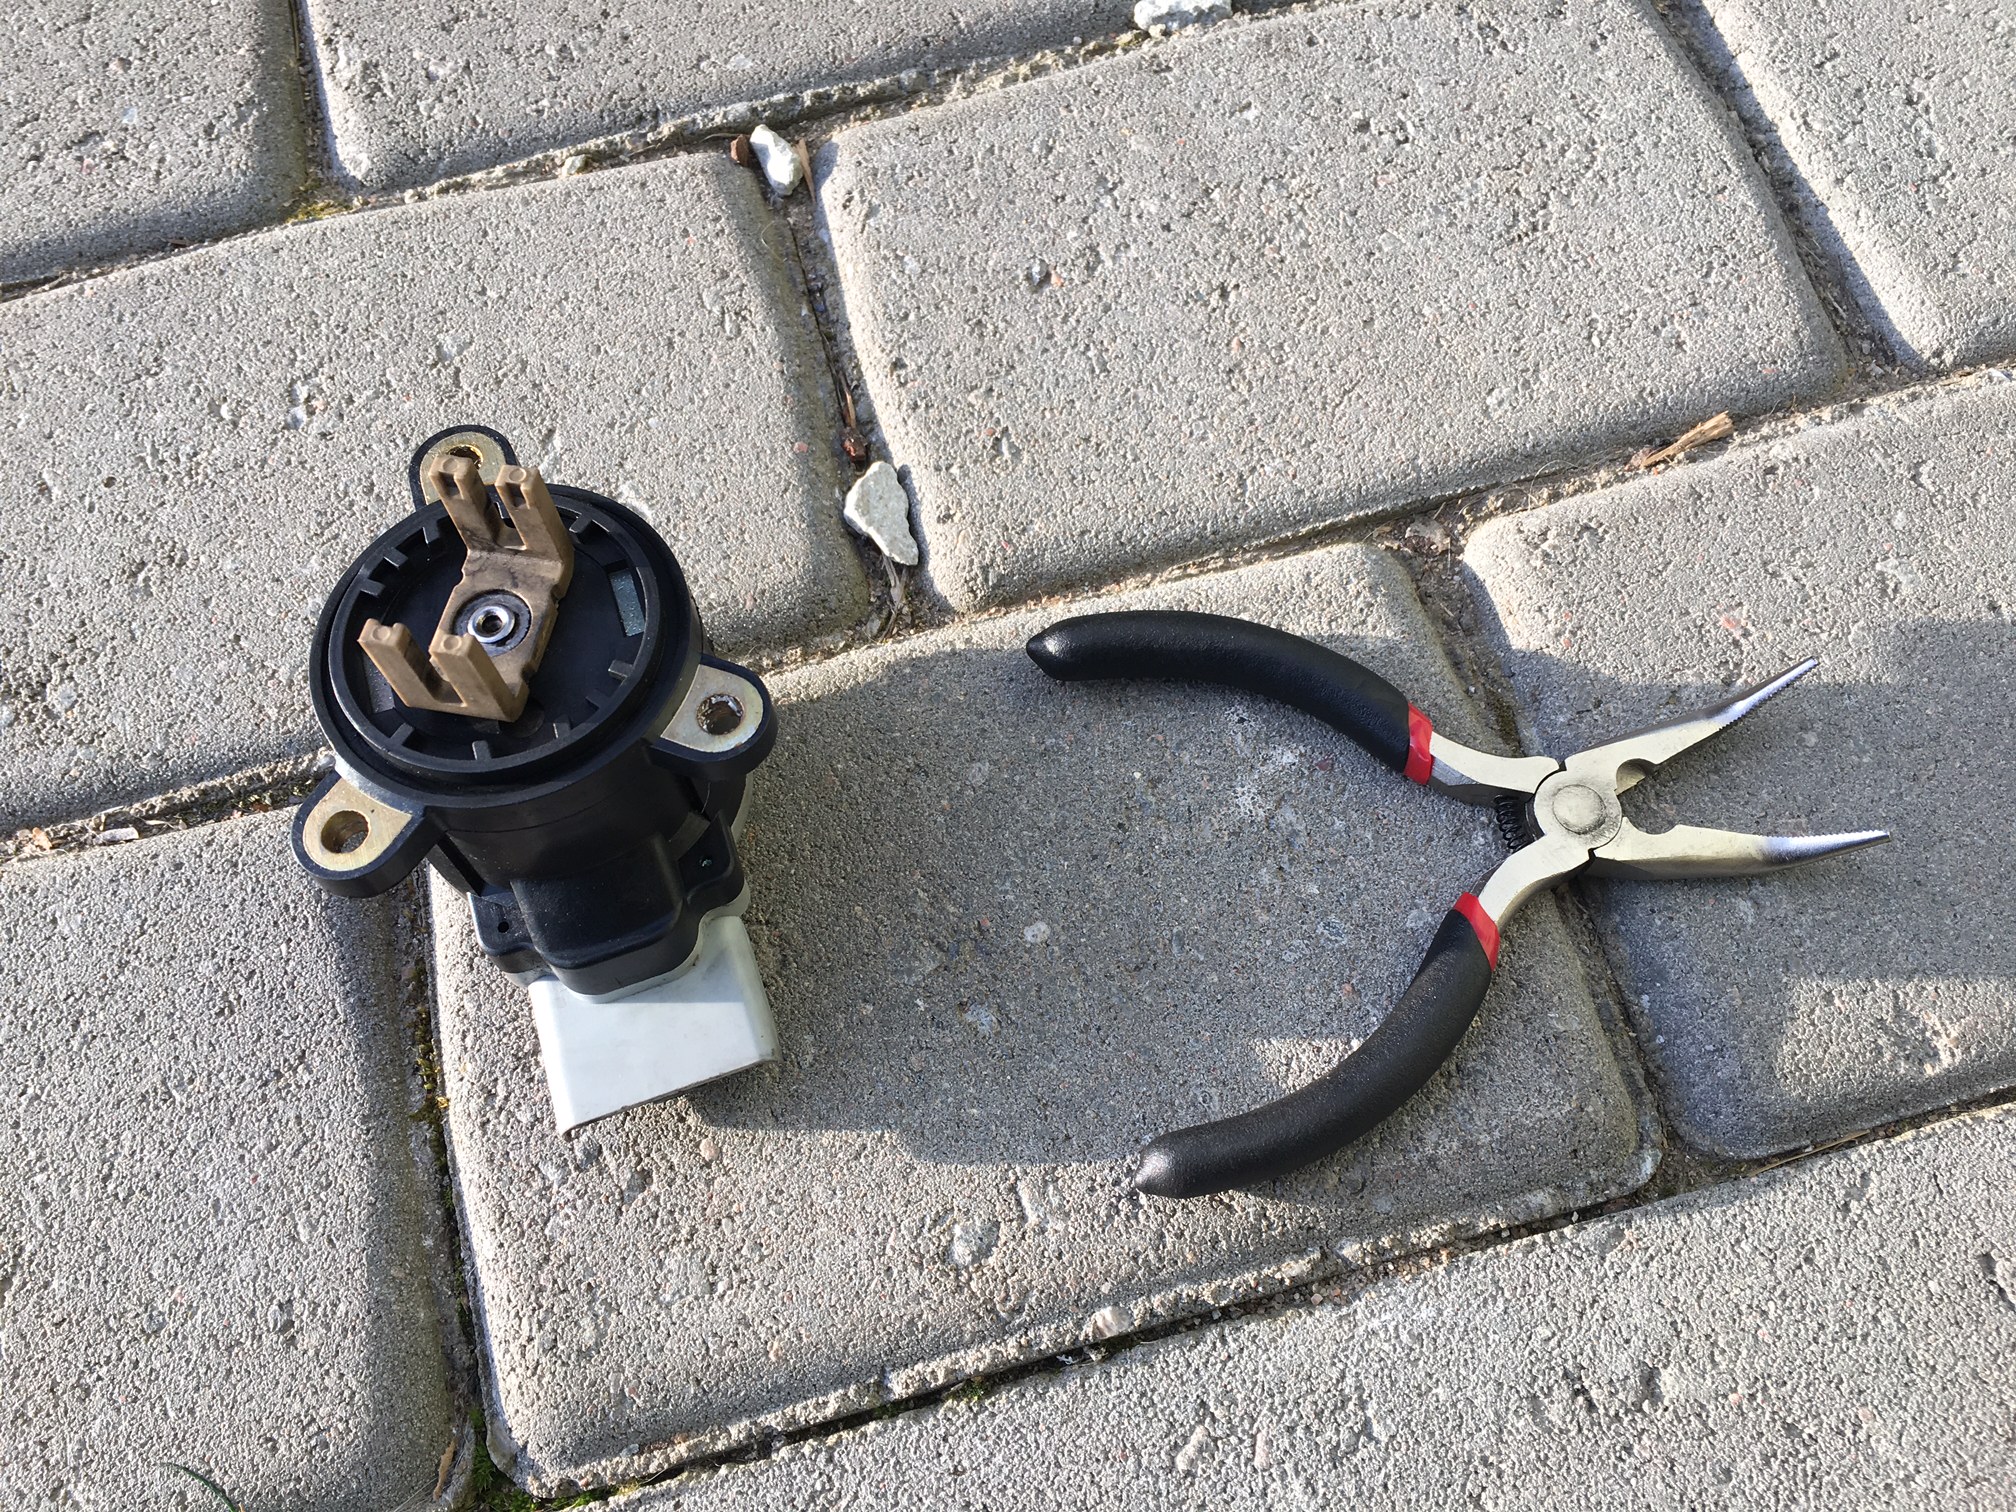 They did the job perfectly, you can just fit your hand to squeeze the clip (climbing onto the front panel with you knees ofcourse): 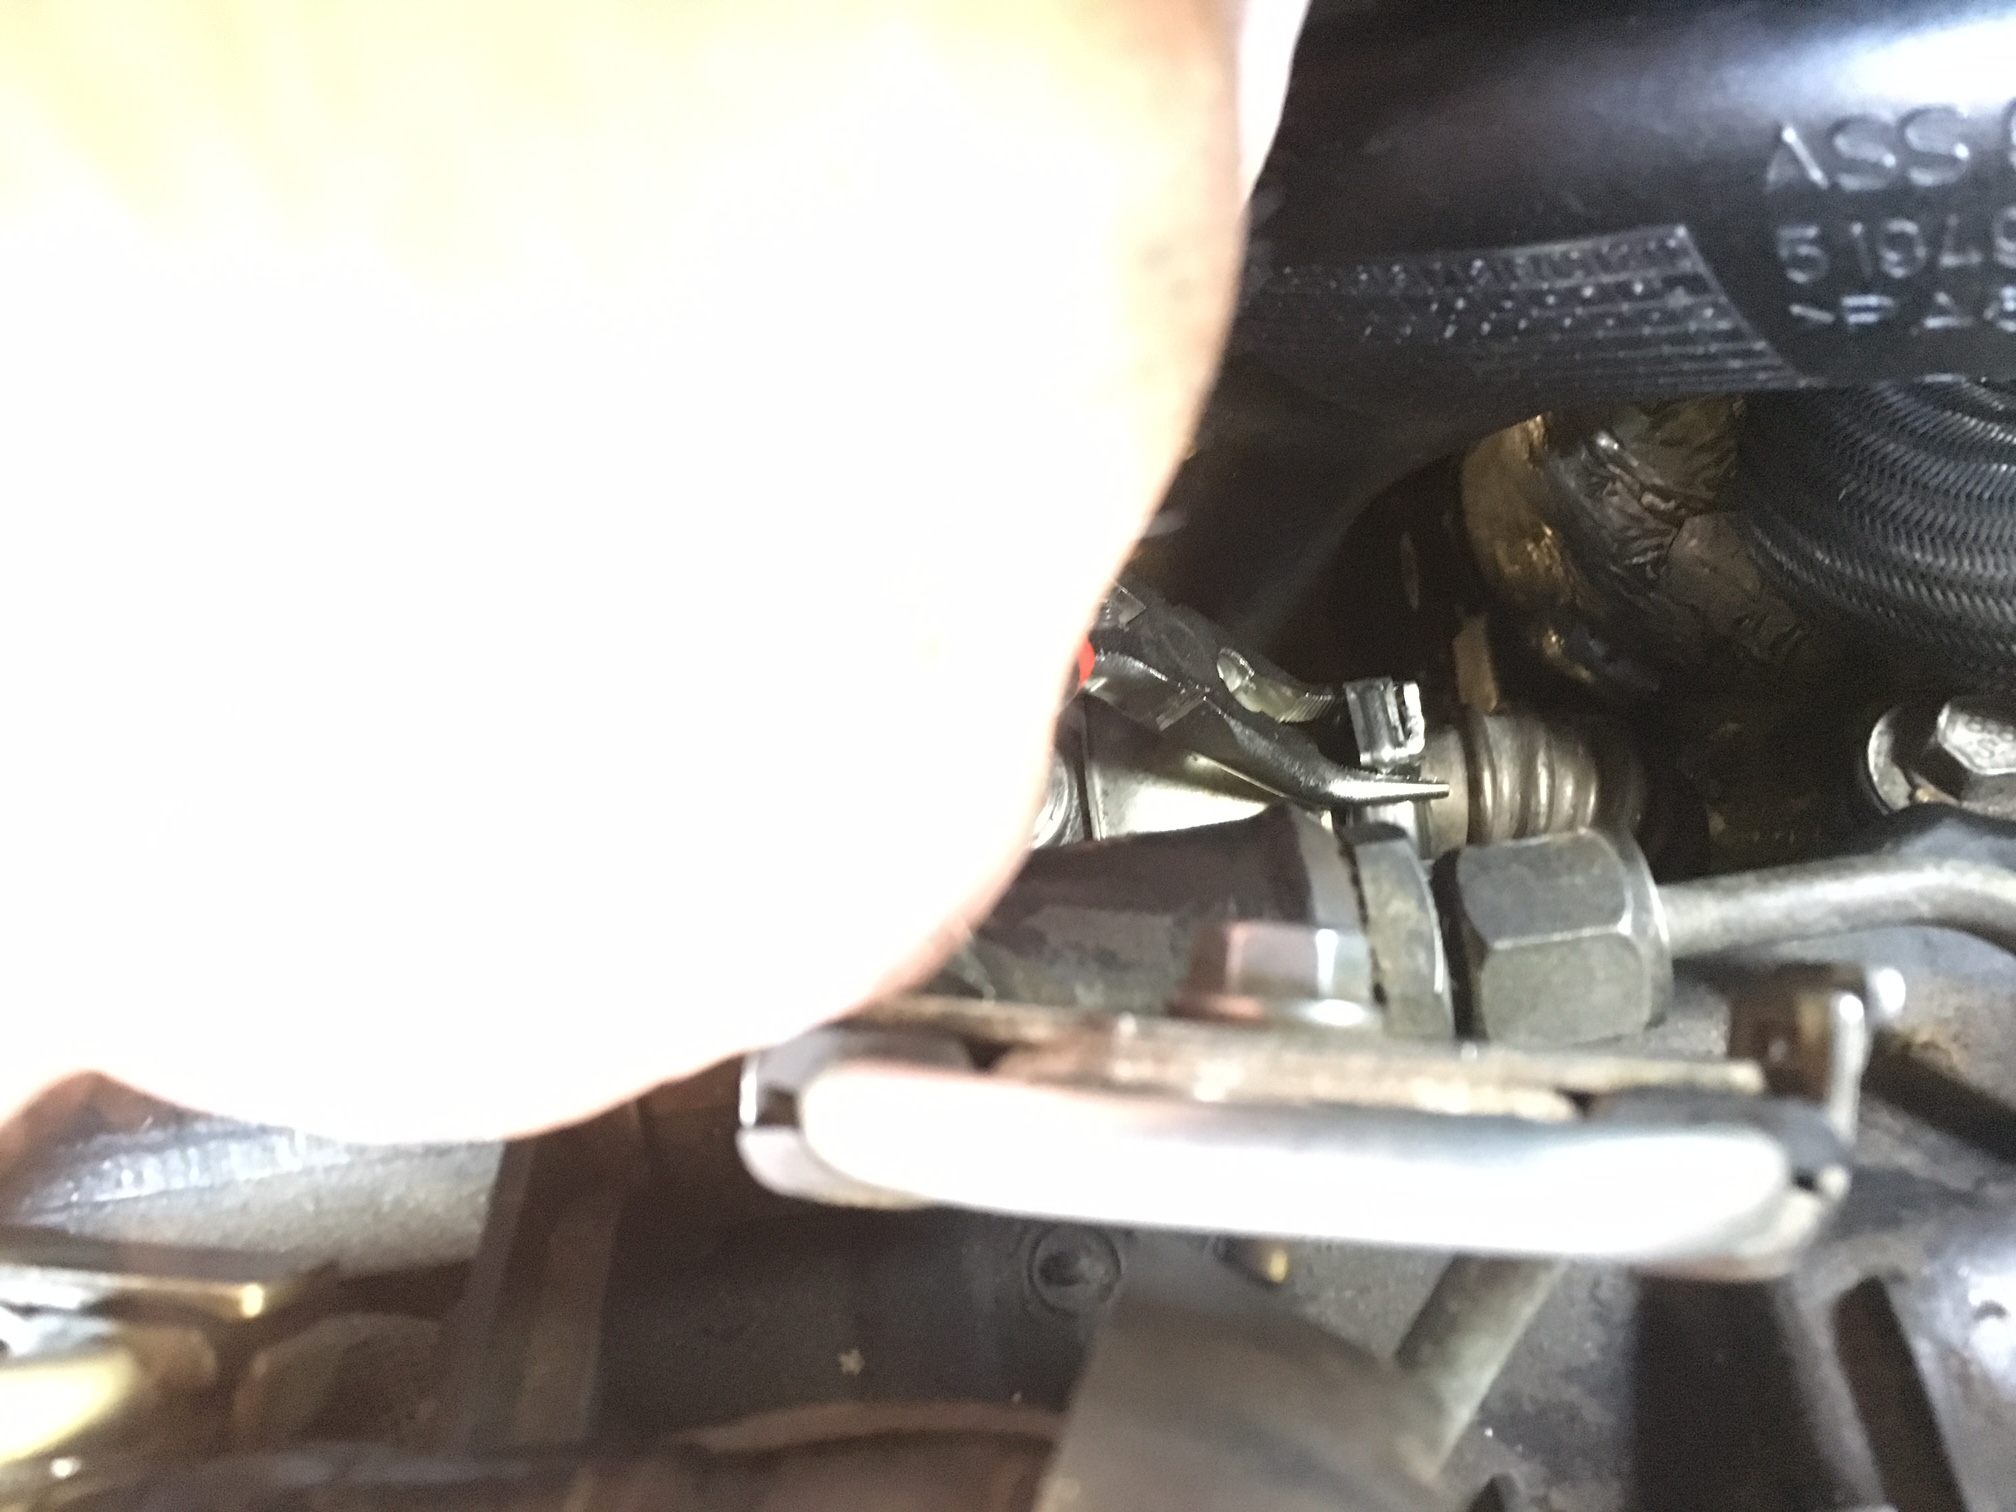 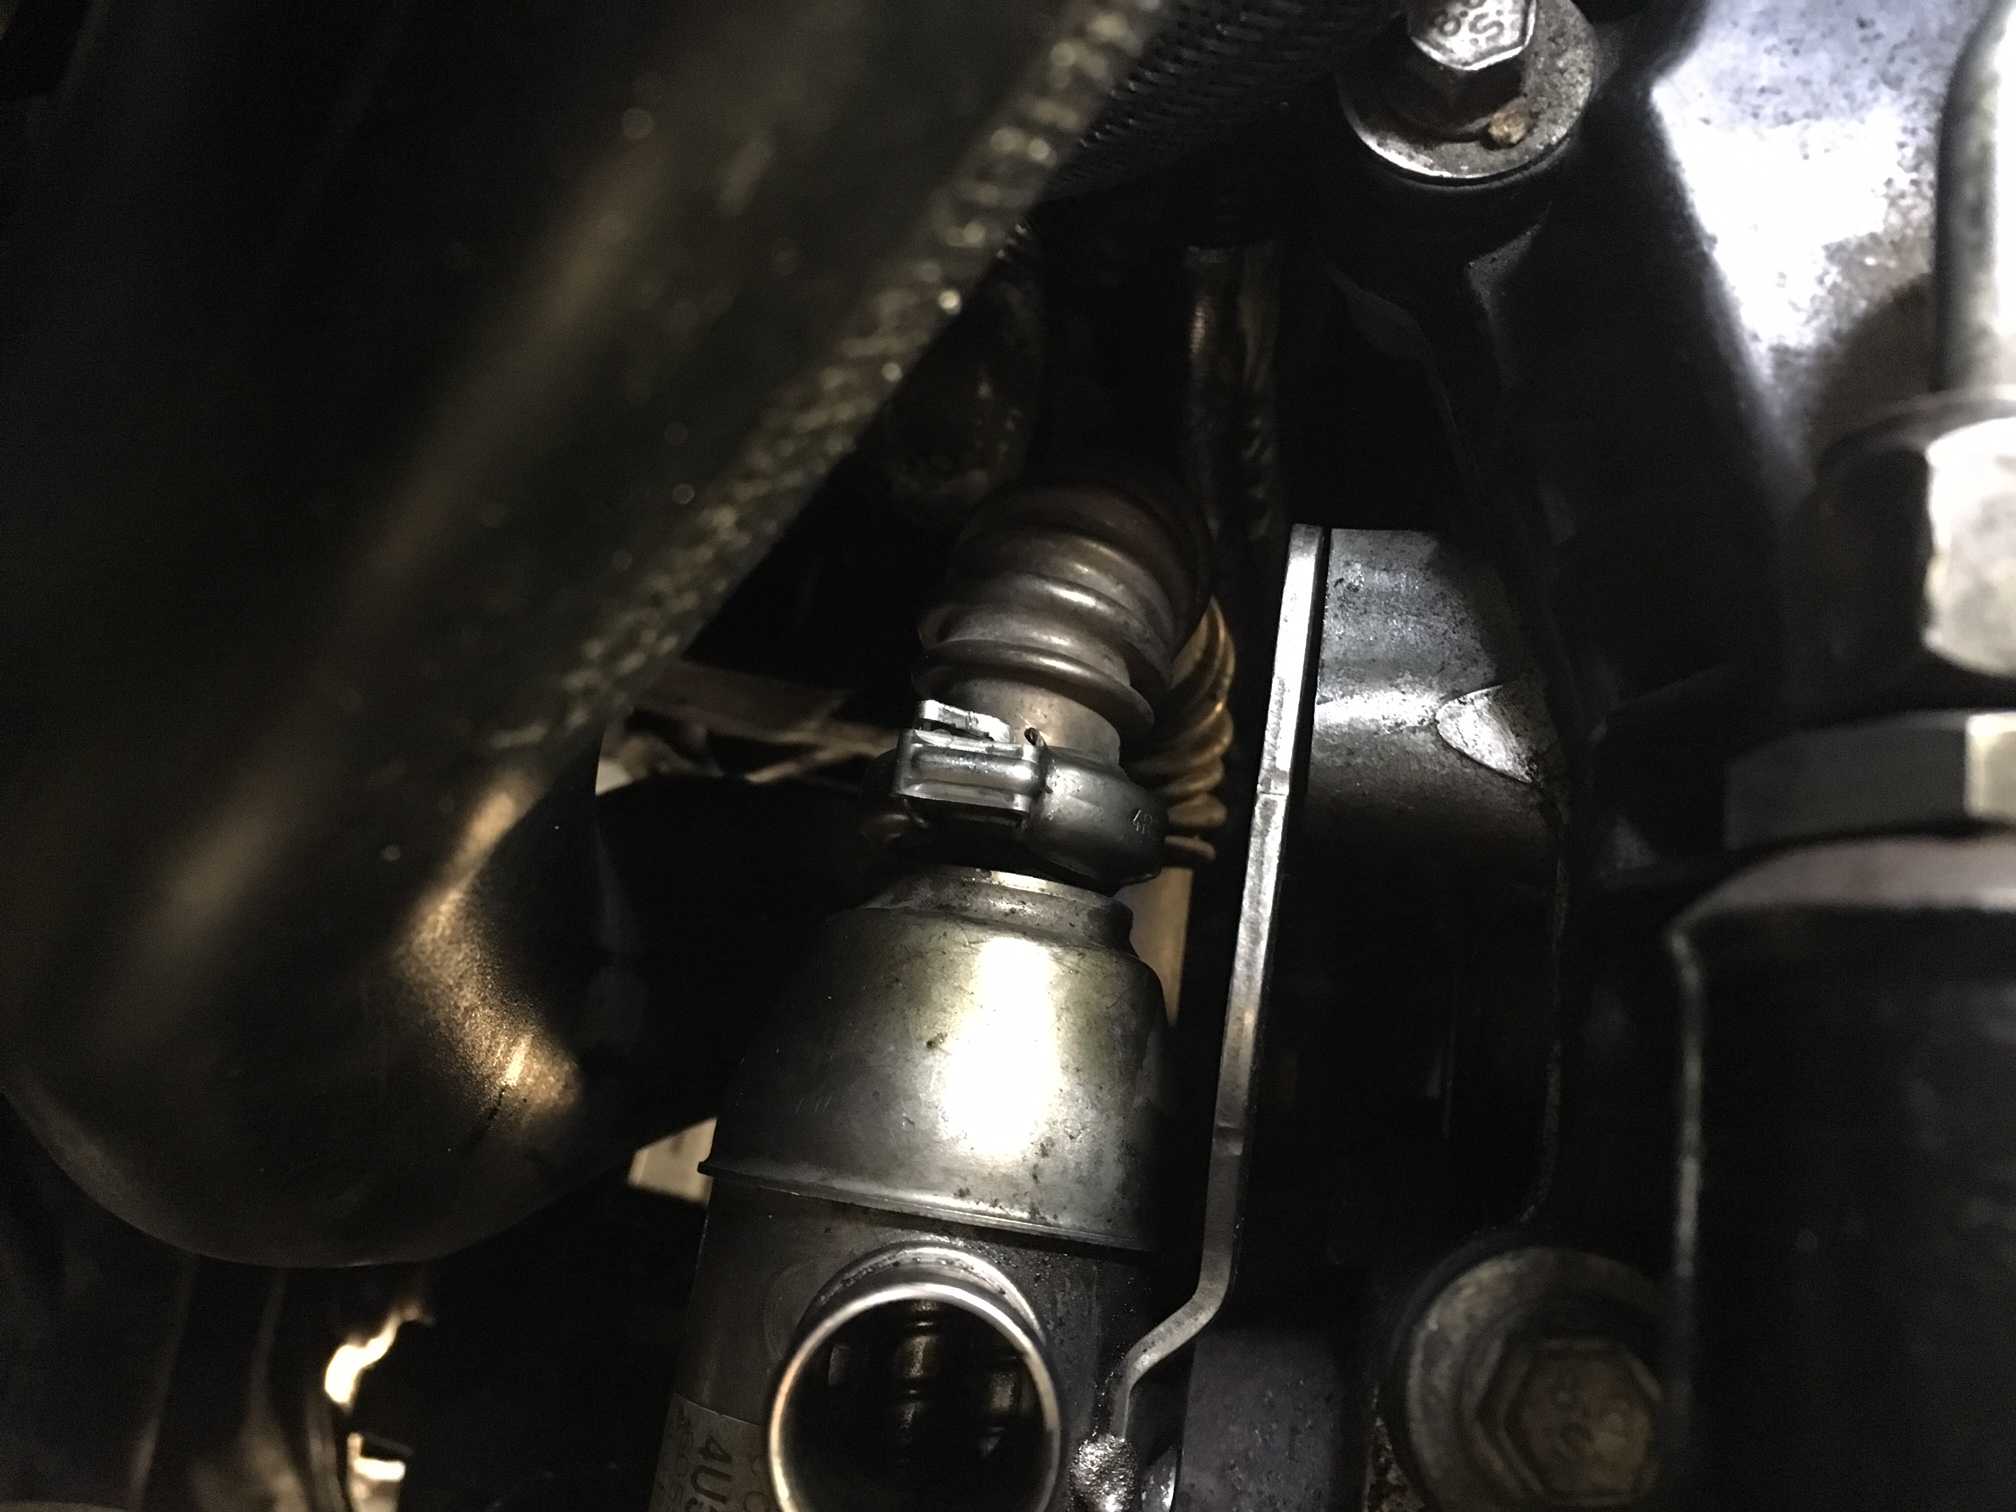 Finally put all the needed bolts and connections back and connect the coolant hoses. 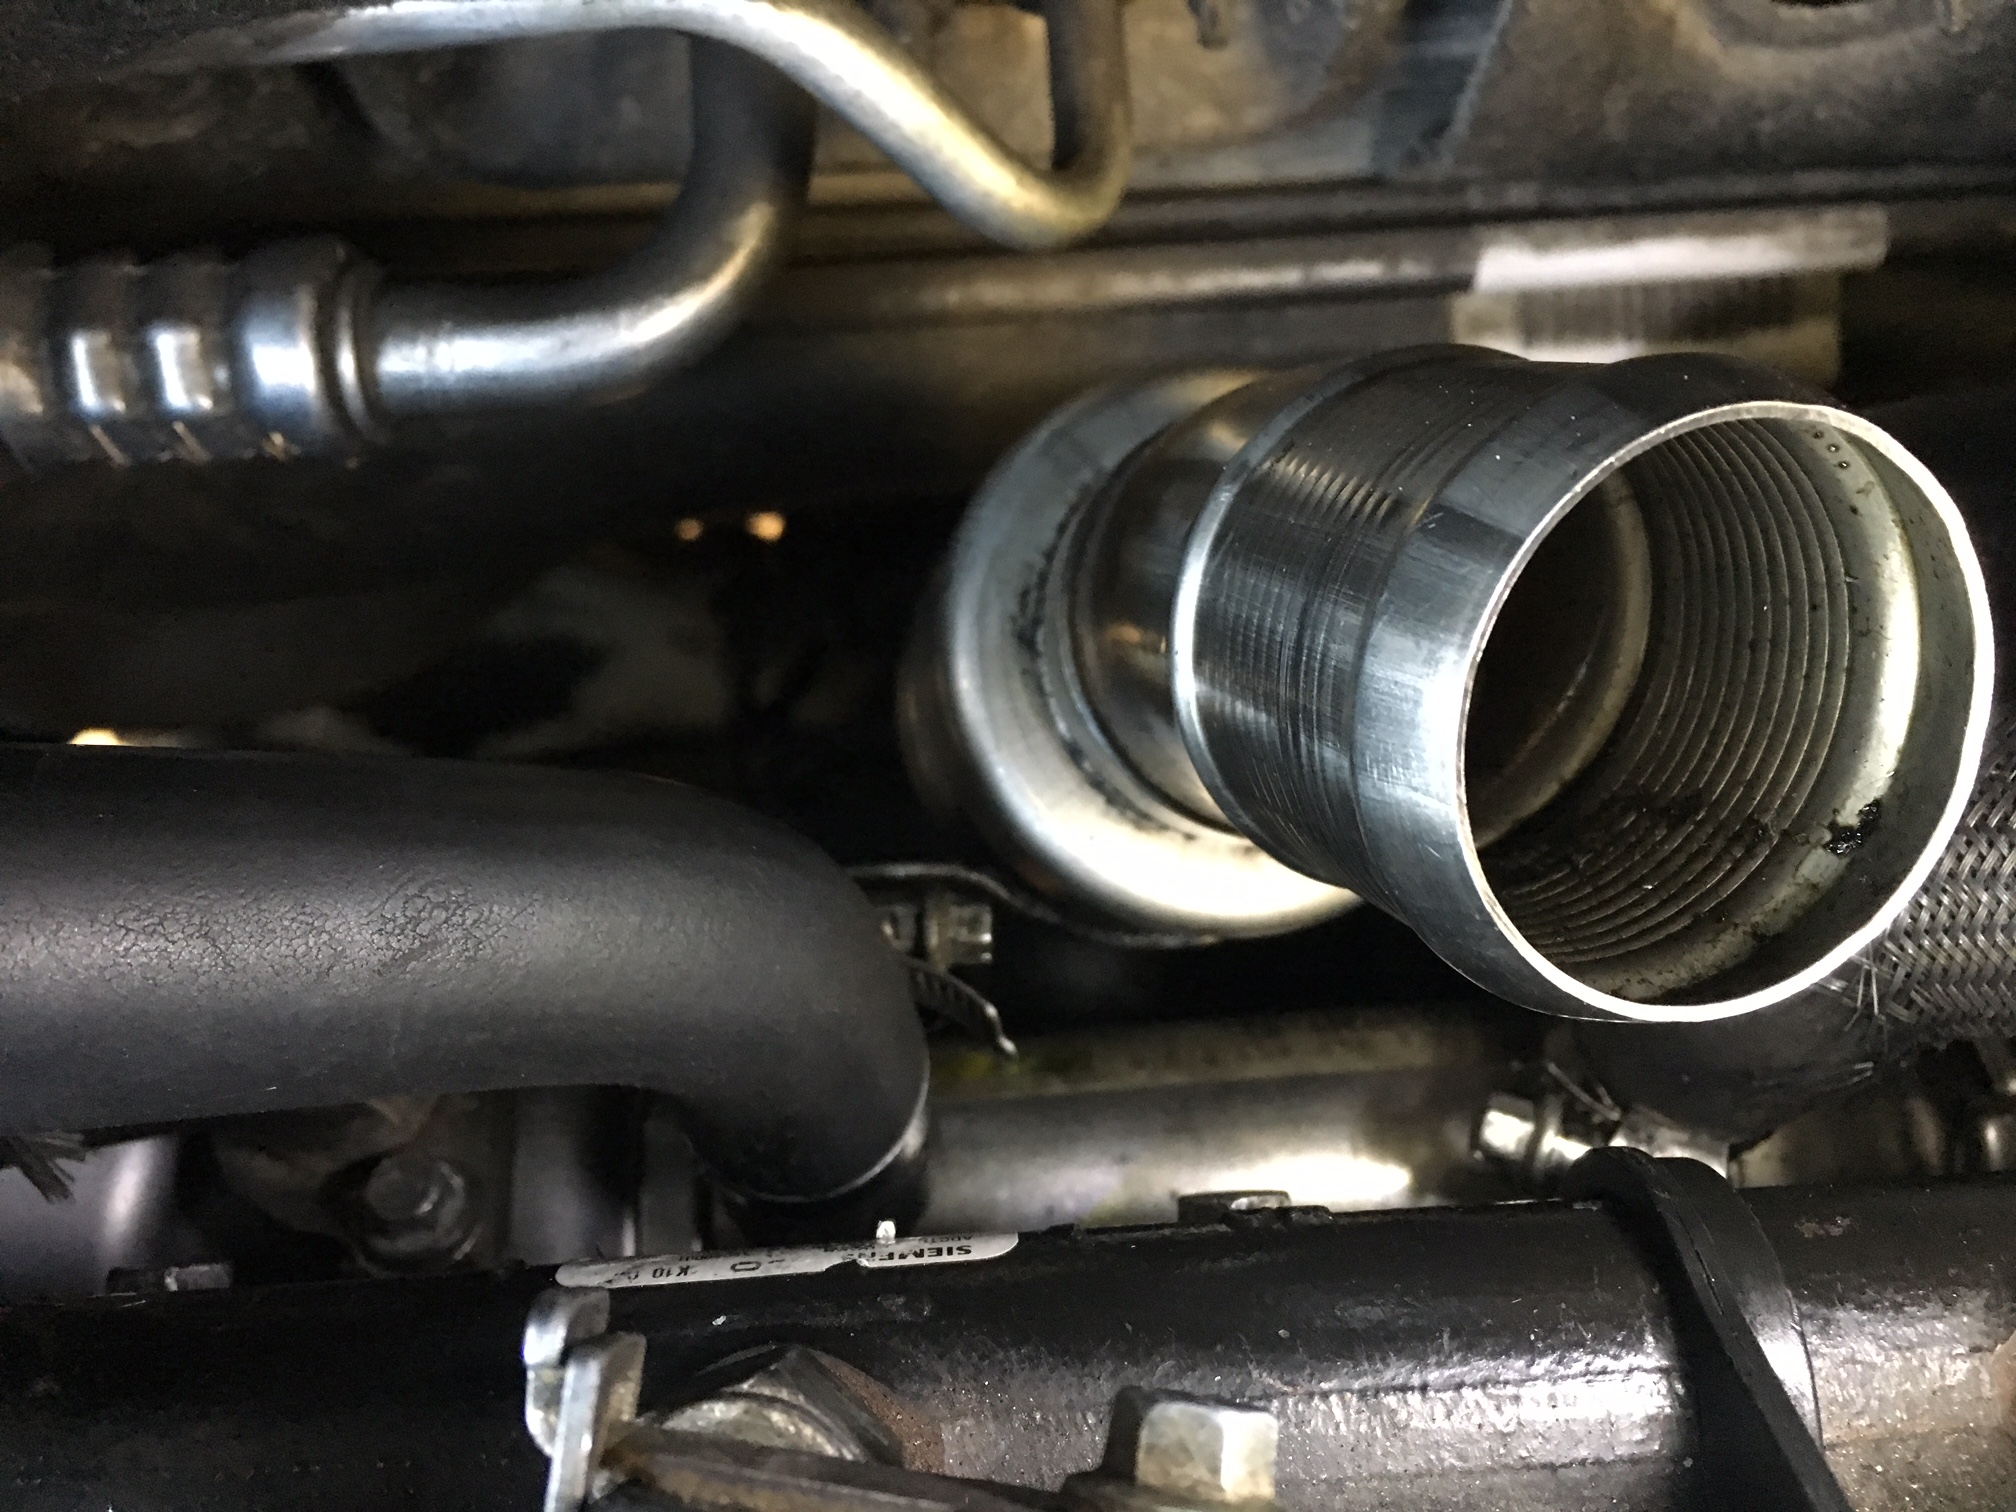 The easiest Clic GR connection is on the throttle housing side of the metal EGR pipe: 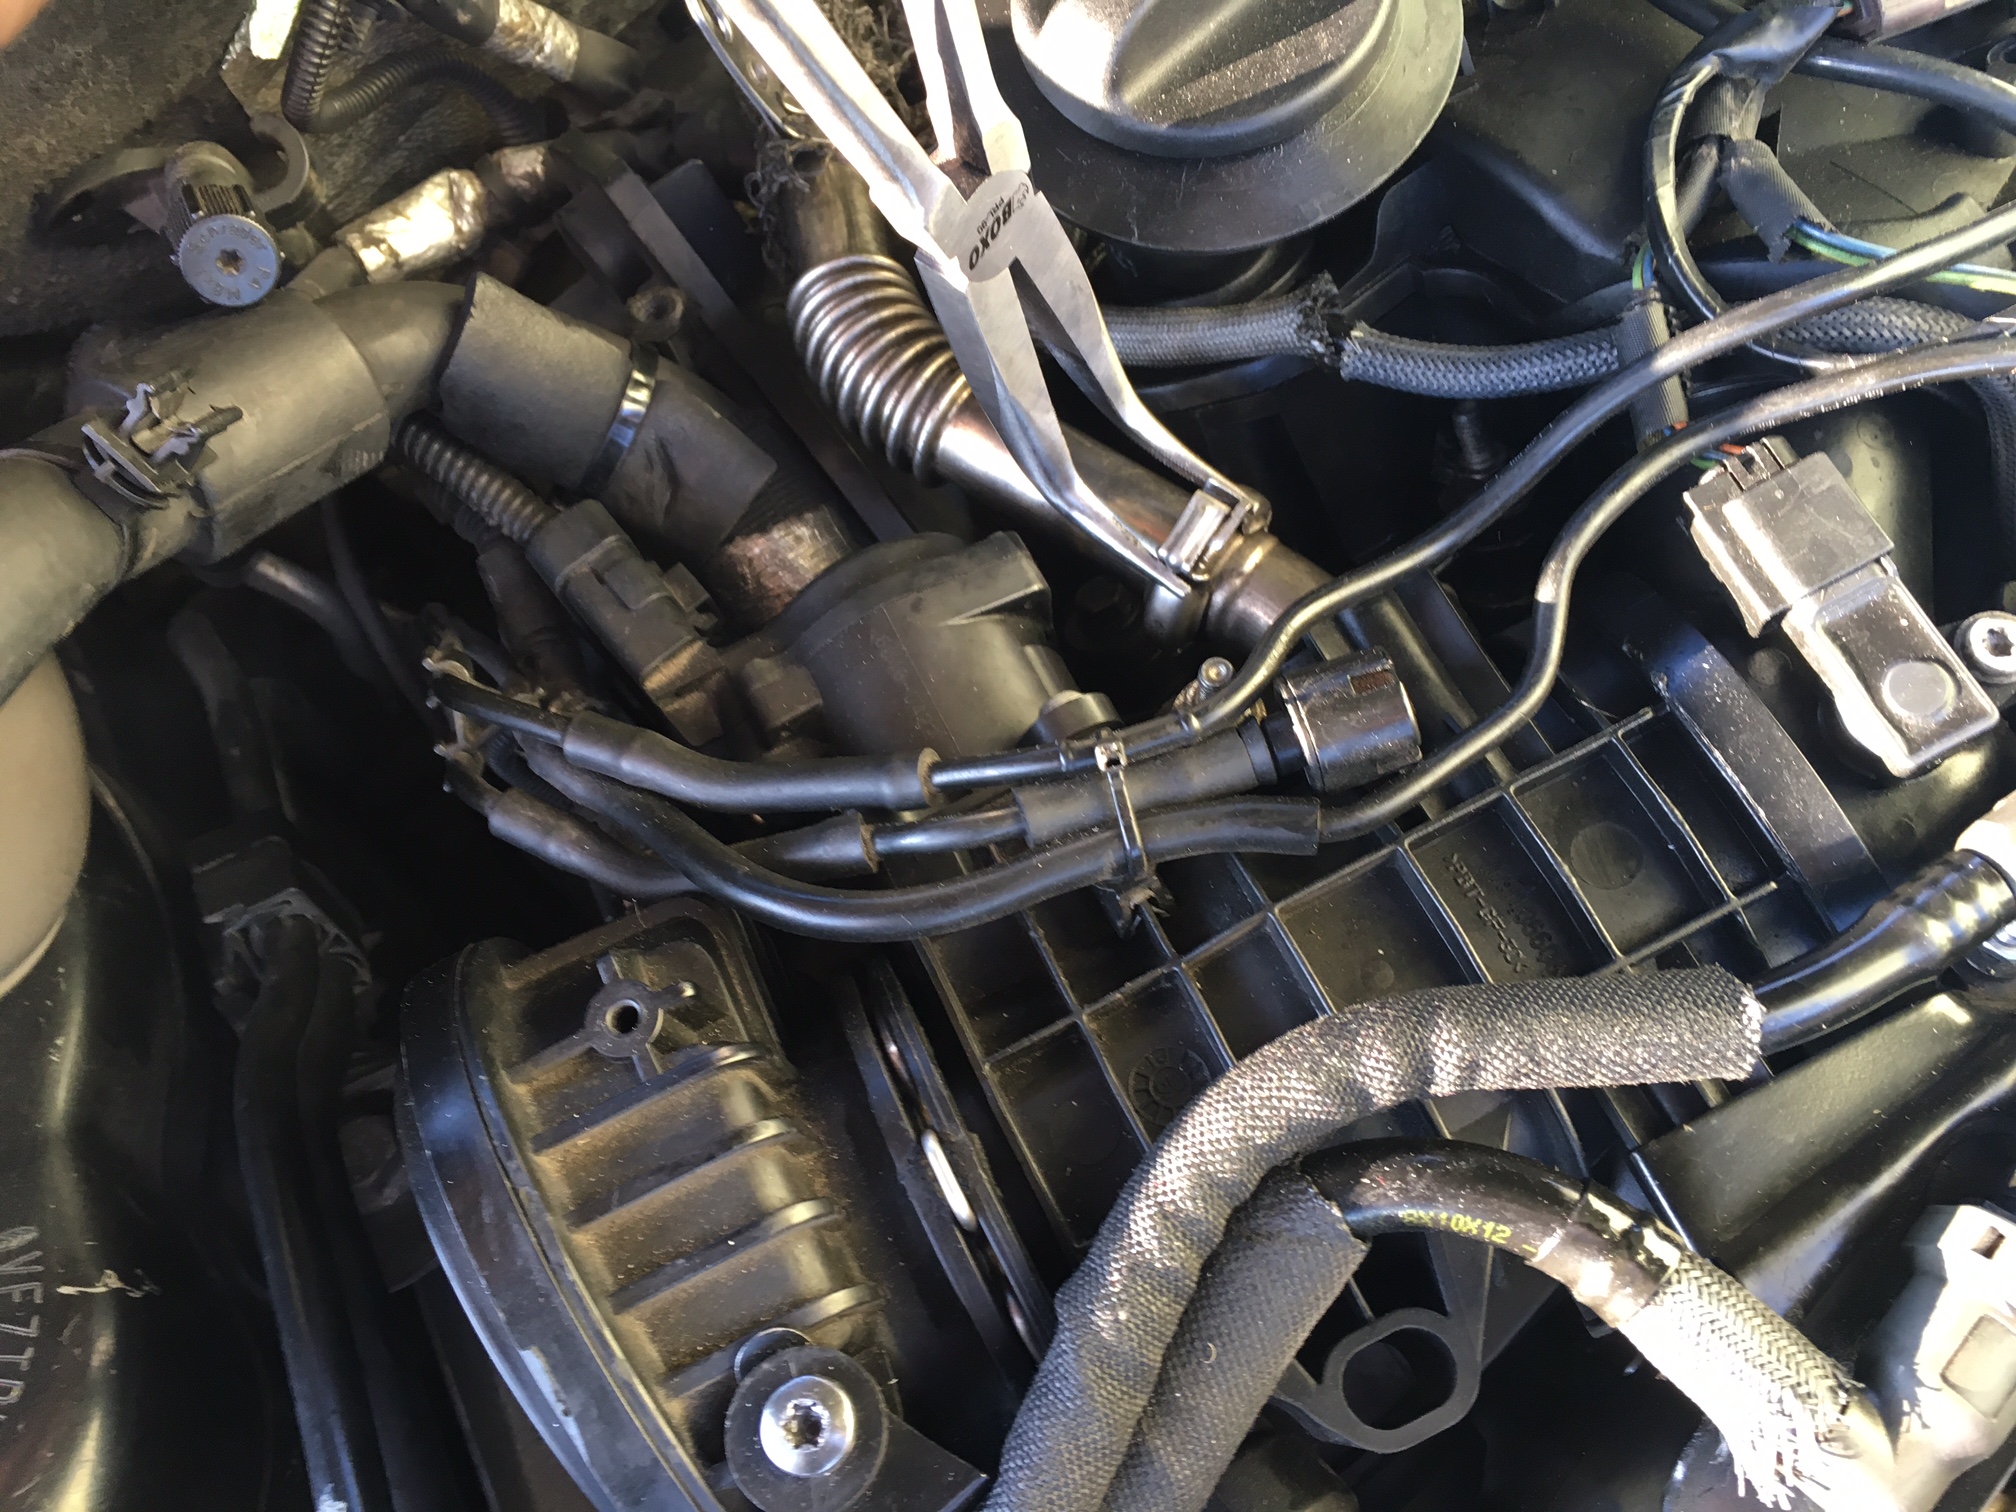 I cleaned my old Valeo valve in and out but ofcourse it did not do any good. The low airflow fault code is still present. No MIL at least and I can drive the car normally. There was nothing visibly wrong with the valve, after cleaning it looked and moved like new so don´t know where the actual problem is. Maybe the front one is clogged instead hence not letting as much air through as prescribed and causing the front flowmeter reading higher numbers not the rear one causing rear flowmeter lower numbers. It also seems to be the original from the factory so maybe I will take it off next and see. 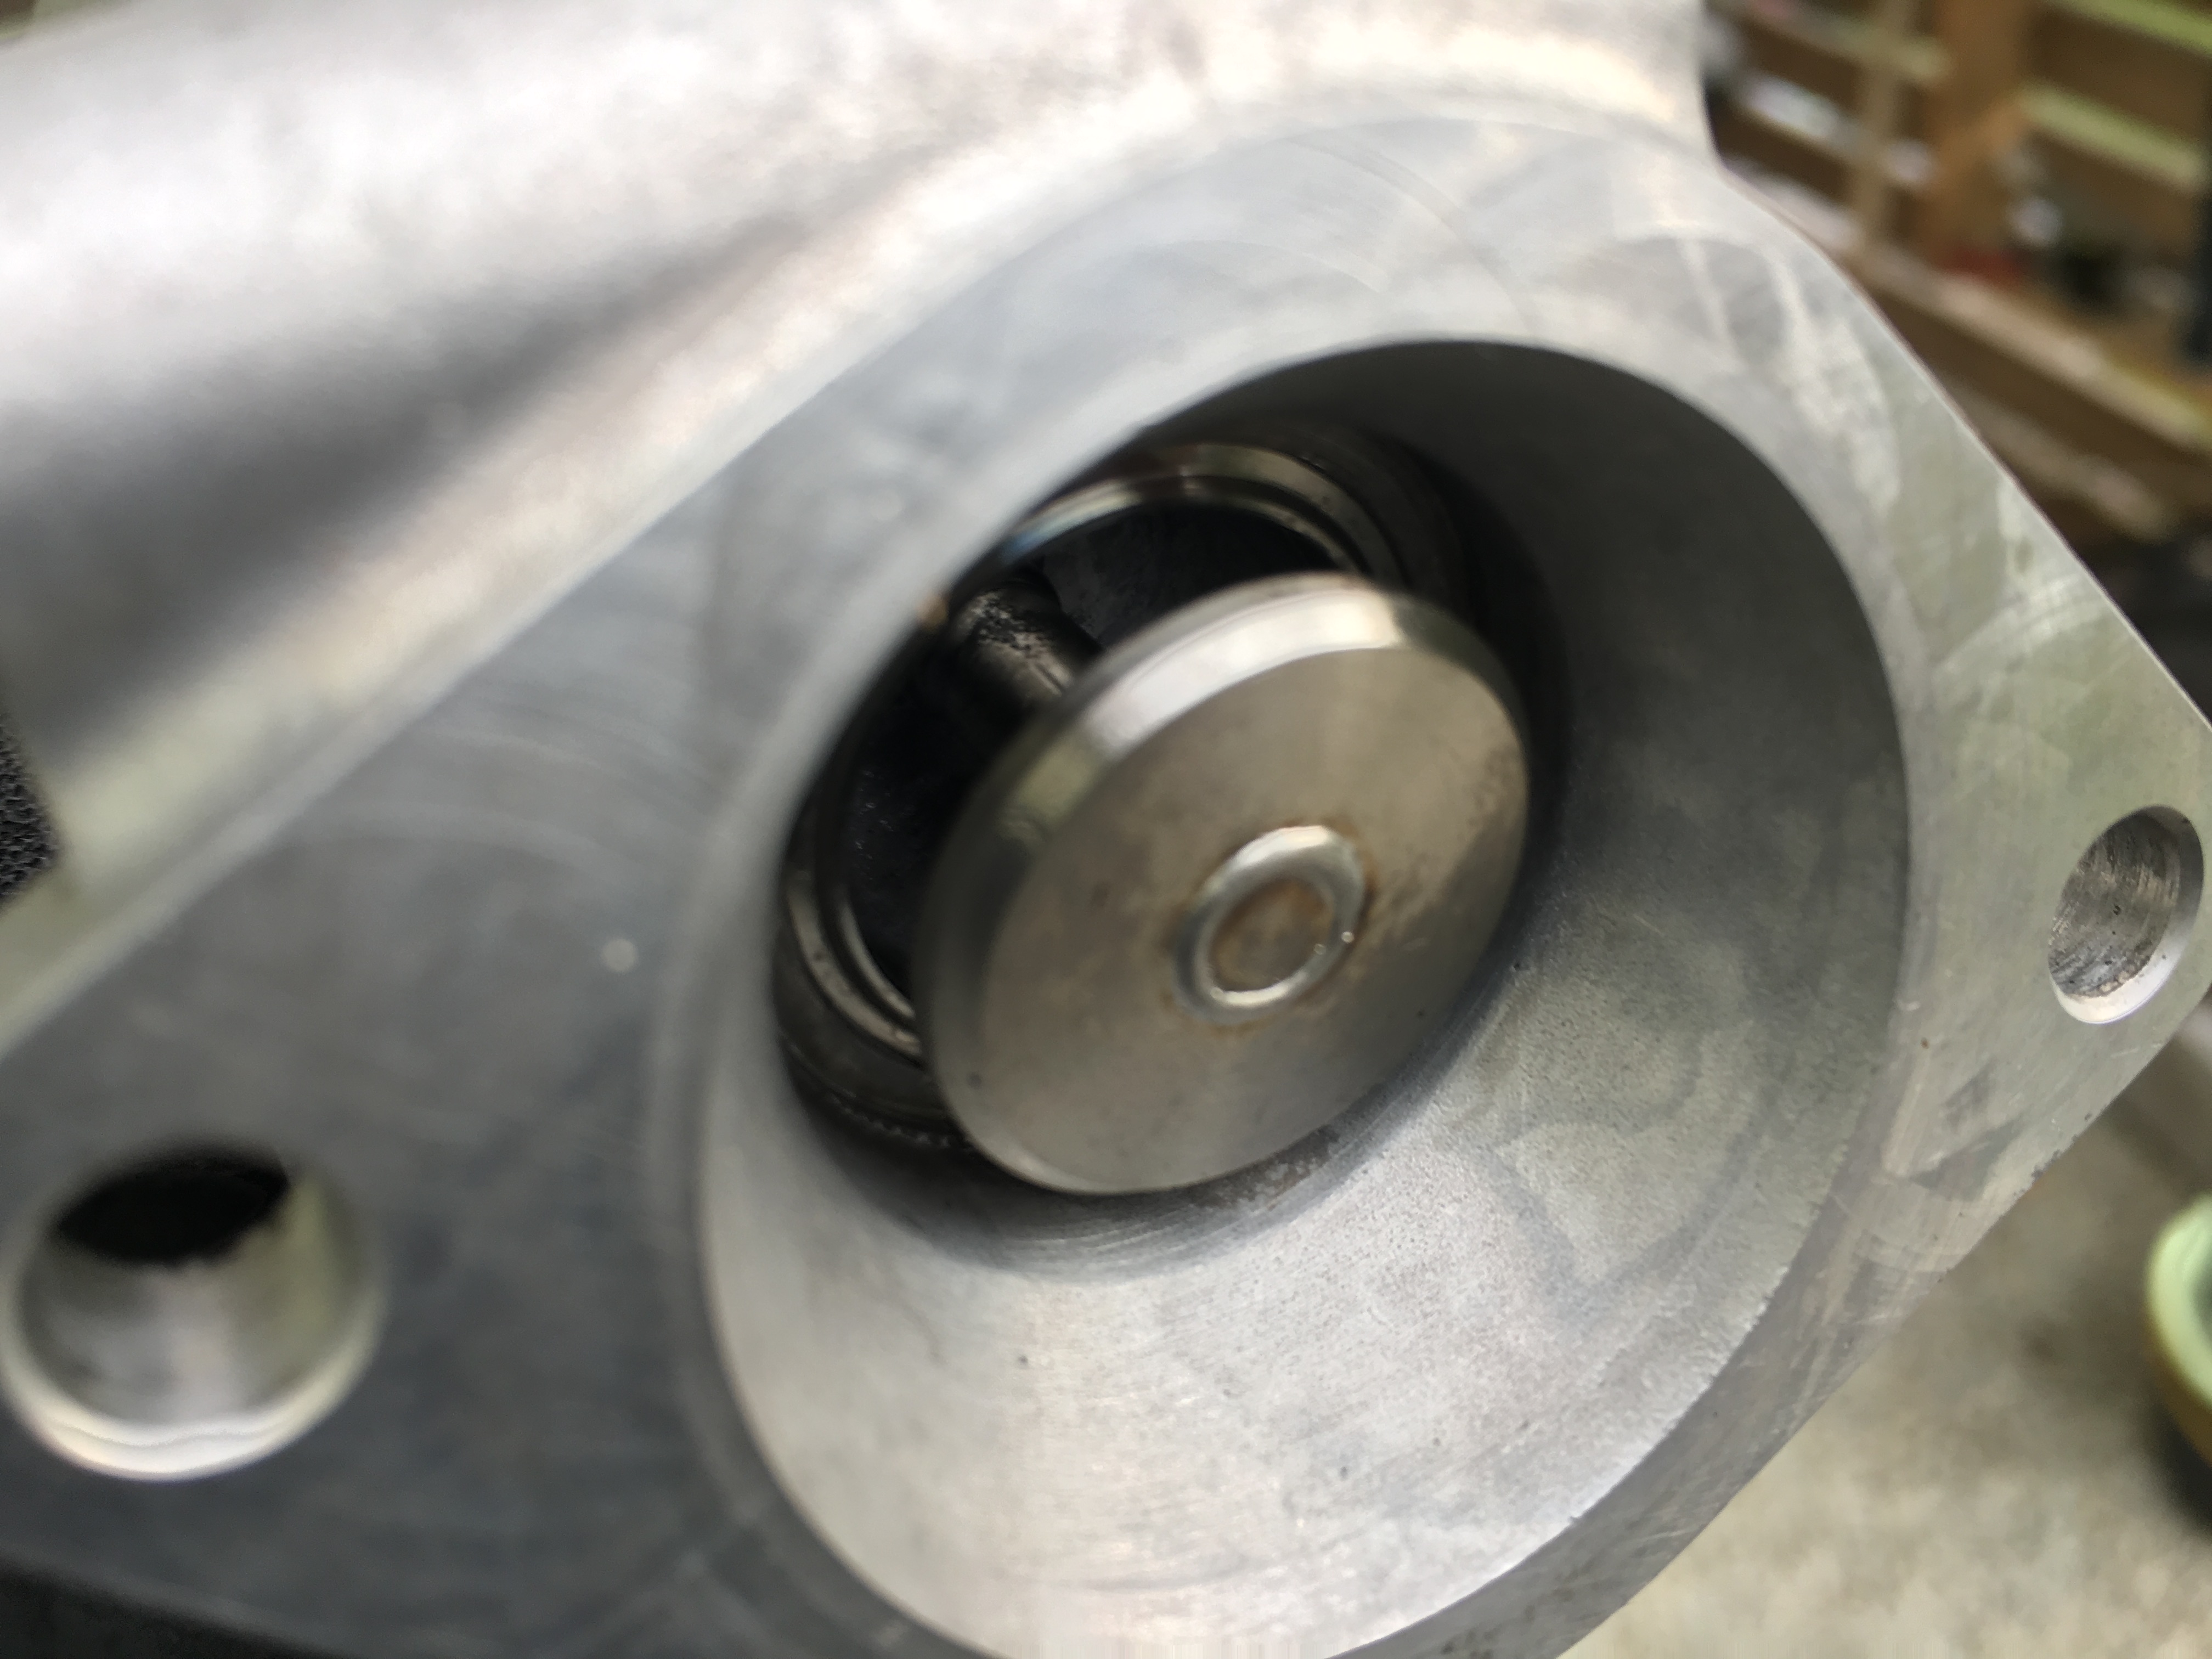 Finally, I have large hands and I am not the lightest but I could fit my hands behind the engine and into other places needed and the front panel carried my weight easily and so on. The job is perfectly doable!! |
||
|
|
|
||
|
cruiserphil
|
|
||
  Member No: #38
Location: Celbridge |
Vaho, Thanks for this post. You make it look easy!!! Best regards, Phil C. |
||
|
|
|
||
|
vaho
|
|
||
|
Member No: #2228
Location: Tallinn |
Well, it kind of is, especially if you had practice  . First time I had problems removing the right coolant hose from the EGR cooler. The clamp came off easily but the hose was sitting tight. One can try to remove the hose from the other end like G did but I think it would be equally difficult. Once this hose is undone from whichever end, the rest is just unscrewing. The other hose can be removed once the assembly is out. . First time I had problems removing the right coolant hose from the EGR cooler. The clamp came off easily but the hose was sitting tight. One can try to remove the hose from the other end like G did but I think it would be equally difficult. Once this hose is undone from whichever end, the rest is just unscrewing. The other hose can be removed once the assembly is out.
|
||
|
|
|
||
|
gmerry
|
|
||
|
Member No: #21
Location: Scotland |
Hi Vaho, yes you need to be a special gorilla (with extra lon...g arms) to work at the back of the engine, unless as you describe you perch on top of the slam panel or engine itself. And I'm way over 6'. Certainly swopping out the spring hose clamps for worm drives is the way to go to ease maintenance. regards G PS, many years ago on this forum, I think we had advice via some official service agent that the entire engine had to come out to change the rear EGR valve: so glad we put that one to bed. |
||
|
|
|
||
|
vaho
|
|
||
|
Member No: #2228
Location: Tallinn |
I have heard it too, about the engine removal - crazy. It is good to have a mirror also. I bought a small one with a bendable stick for some 5 euros. It is handy to check the connections afterwards or establishing where what is if you do it for the first time. Especially to check if you can access all the connections or clips. Also I did not remove the turbo inlet pipe nor the undertray. Luckily did not drop anything
|
||
|
|
|
||
|
321dave
|
|
||
|
Member No: #614
Location: Dublin |
I've been down the back of the engine recently and it's possible with the fancy cable crimping pliers to sort of remotely open and close the quick release EGR hose clamps. That pliers worked very well for me a few times around the back of the engine. Would recommend one highly with a good small mirror and integrated light. But, its best get a strong cable pliers as a good bit of force can be needed to release the clamps. Worth spending on a good tool that will not break. | ||
|
|
|
||
Go to page >>
|
|
 User Colour Key: User Colour Key:Head Administrator, Administrator, C6 owner, Technical Expert, C6 Premier Discount Club |
|
Privacy Policy | Cookie Policy | Site Disclaimer | Contact Details | Warranty | Sitemap | C6 Insurance | Quick Facts | Re Call Info | Downloads | Error Codes
| Site and Graphics created by: C6Dave Forum Icons by Axialis Emotes by Seb |  |

