| C6owners :: Forums :: C6 Support :: Super Sticky |
<< Previous thread | Next thread >>
|
starter replacement dt17ed4 |
    Please Register to enjoy additional Member Benefits |
| Author | Post | ||
ststech
 
|
|
||
    Member No: #1845
Location: CREWKERNE somerset |
going to change starter tomorrow have downloaded the article on how to replace it but i have been out and tried to undo the fuel filter housing as it has to be removed for access I have undone all bolts i could see on top and side but it will not budge, it appears to be mounted to a black metal plate which in some way is attached to engine block i cannot remove it for the life of me also there doesn't appear to be any documentation relating to how to remove refit it has anyone any idea how to remove the housing regards Simon |
||
|
|||
|
speedfix
|
|
||
 Member No: #1043
Location: south west |
Filter housing has four fixings, one of the lower ones is not in line with the others! | ||
|
|
|
||
|
e3steve
|
|
||
  Member No: #1163
Location: Warsash, Hants & Palma de Mallorca, Spain |
This helps access to the starter - Click Here - | ||
|
|
|
||
Black_Lemon

|
|
||
 Member No: #1461
Location: Oslo |
You don´t need to change the starter only change the bearings inside the starter. I had this done by a garage and saved money that way. | ||
|
|
|
||
|
ststech
|
|
||
|
Member No: #1845
Location: CREWKERNE somerset |
i am going to send oid starter away for refurbishment so i have a spare |
||
|
|
|
||
|
e3steve
|
|
||
|
Member No: #1163
Location: Warsash, Hants & Palma de Mallorca, Spain |
Well, after 'going in' and removing the starter motor a month ago, my 'fix' has unfixed itself. The bush on the very end of the final drive pinion had a lot of side-play. I formed some thin brass sheet (I cut up an old motorcycle carburetor float!) and 'shimmed' the pinion spindle. The starter spun like a good'un for about three weeks, but it's gradually slowed to the speed and not-wanna-start situation again. The pinion spindle flops around in the bush to the point where it's partially orbiting within the bush, as opposed to spinning. I've just bought this - Click Here - so I'll keep you all informed as to how it fits and behaves. I've taken pictures of the previous incursion required in order to remove & refit; I just haven't had the time to create a tutorial yet. Incidentally, don't bother with this - Click Here - used starter; it probably won't last long! |
||
|
|
|
||
|
e3steve
|
|
||
|
Member No: #1163
Location: Warsash, Hants & Palma de Mallorca, Spain |
Bingo. I replaced the OE Denso starter with the Premier Factors one from eBay -- £123-ish -- and the car now starts with the briefest of flicks of the key! Having carried out the removal & refitting once already, I was able to do the job this time without removing the fuel filter and its associated pipework by simply removing the under-bonnet fusebox and the air filter in its entirety (the latter should be done for this task anyway). The replacement job took me about three to four hours. Tutorial images follow... 
|
||
|
|
|
||
|
e3steve
|
|
||
|
Member No: #1163
Location: Warsash, Hants & Palma de Mallorca, Spain |
NOTES TO OBSERVE: Disconnection of the battery negative terminal is essential! Close the latch in the boot lid, using the shaft of a screwdriver, to prevent accidental closure of the lid. Use ⅜"-drive sockets, extensions & u/j. A 13mm deep socket on a u/j works for all three bolts. The single hidden bolt over the back of the starter gearbox is accessible by feel only! Slender hands only should apply. The starter motor, for removal, needs to be turned laterally (not axially) thru 90° a/c/w, and extricated between the pipework & gearshift cable bracket, pinion end first. Refitting of the new starter is a reversal of the above: motor end first, pinion end towards you. Patience is a virtue.... 1 & 2 -- Preparation for surgery: 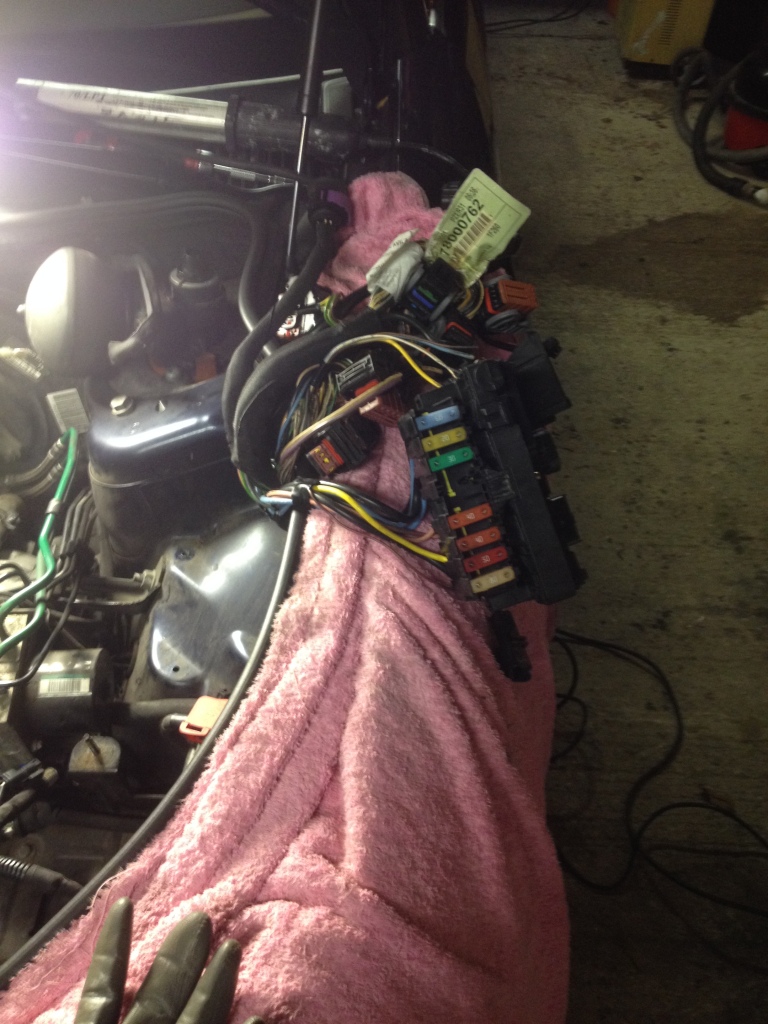 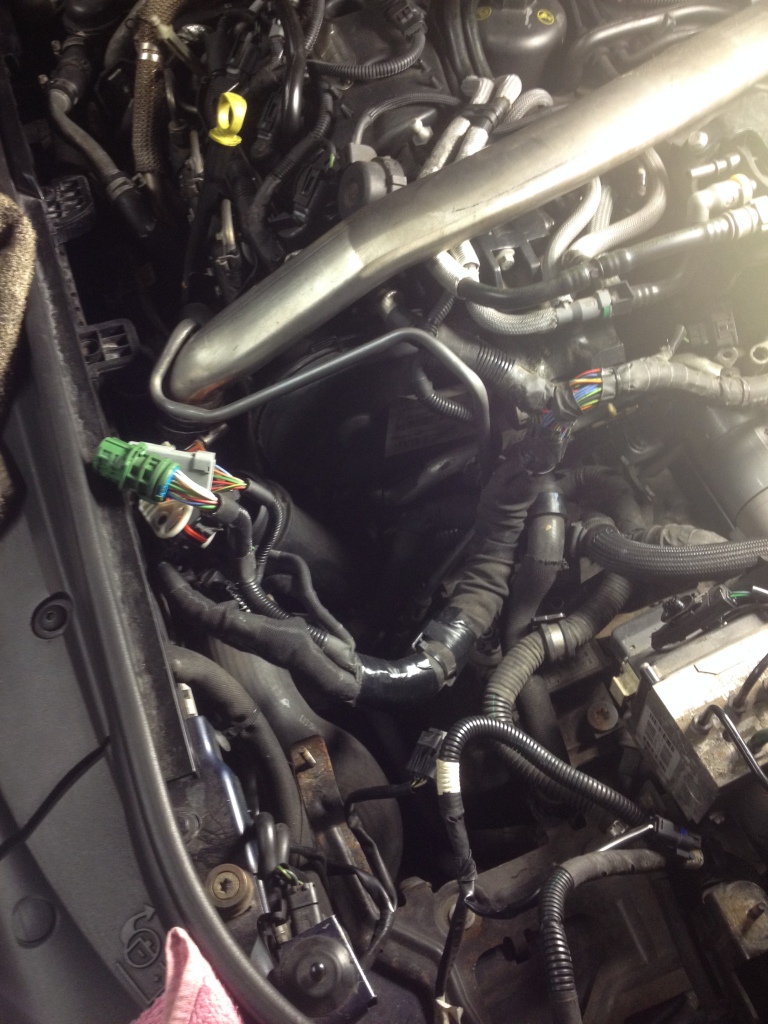 3 & 4 -- In the following two images, note that I bent the wiring harness support bracket, attached to the pipe, upwards by about 45° to improve access a little. 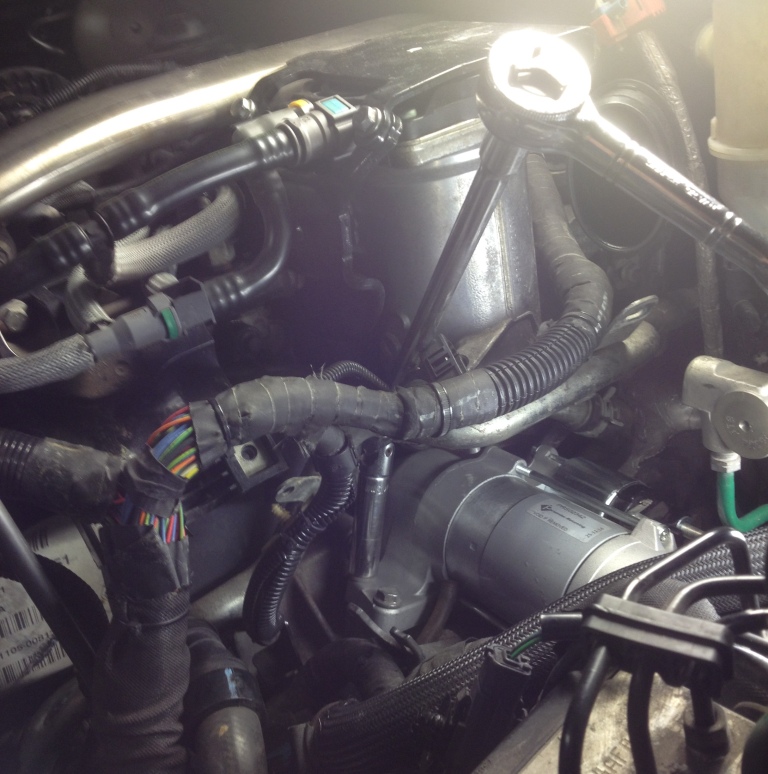 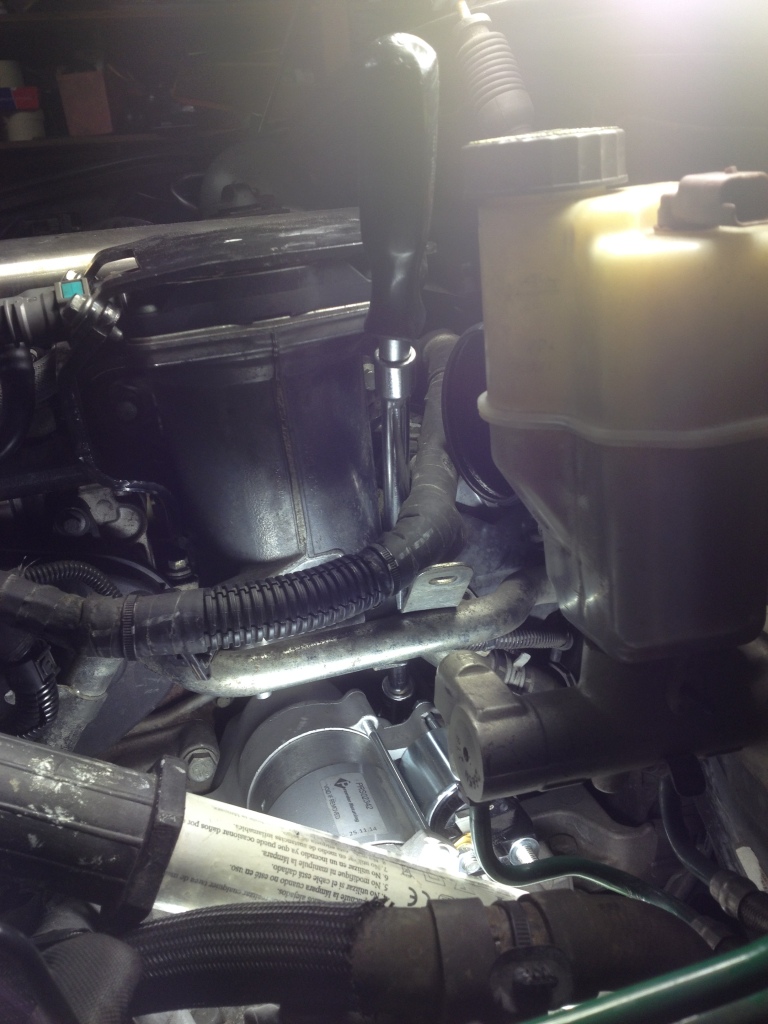 5 -- In place and ready for wiring to be attached:  |
||
|
|
|
||
gmerry

|
|
||
 Member No: #21
Location: Scotland |
Hi e3steve, have you had that old starter apart fully? If a new bush was machined up, would that solve the problem or is the commutator now shot. Regards G |
||
|
|
|
||
|
e3steve
|
|
||
|
Member No: #1163
Location: Warsash, Hants & Palma de Mallorca, Spain |
Hi G, yes, I stripped the motor -- shearing the M6 bolts in the process (I think Denso used thread-lock) -- and checked the com and the brushes. The sun-&-planets gearbox turns sweetly enough, but the final pinion flops about in its end bush, with almost a millimetre of side play! The starter worked pretty well after I shimmed the spindle in the bush but it didn't last. Brass shim isn't resilient enough. A new bush may be a prospect. I had to drill out the sheared bolt tips and re-tap the M6 threads, then I made up the studs you see in the picture. A couple of old quarter inch drive sockets served as spacers to allow me to tighten the nuts: 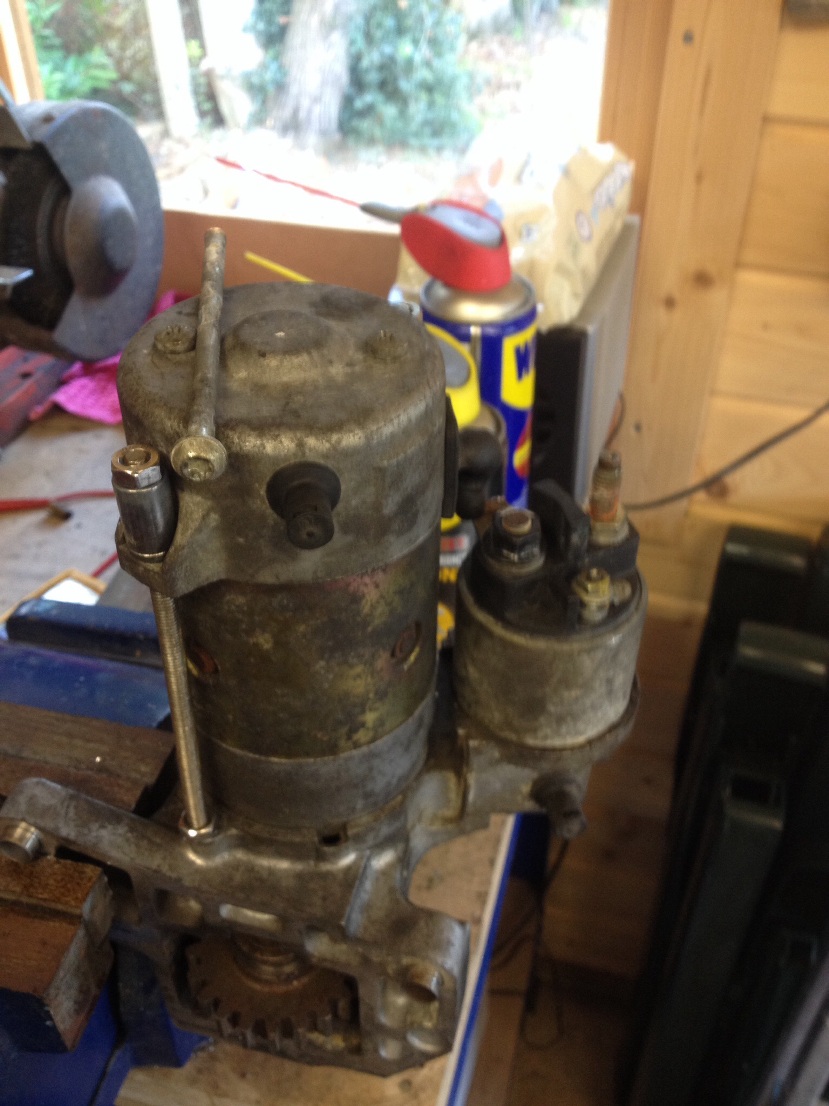 |
||
|
|
|
||
patcrean406

|
|
||
 Member No: #1894
Location: laois |
I'm taking the starter motor out of a 2.7 hdi 407. The starter appears to be held in by a gear linkage cable which I don't want to take off. Is this the same in the C6? does this cable have to be disconnected? | ||
|
|
|
||
|
e3steve
|
|
||
|
Member No: #1163
Location: Warsash, Hants & Palma de Mallorca, Spain |
patcrean406 wrote ... Pat, if it's auto (and if it's the same as the C6!) you must remove the shift cable!I'm taking the starter motor out of a 2.7 hdi 407. The starter appears to be held in by a gear linkage cable which I don't want to take off. Is this the same in the C6? does this cable have to be disconnected? Squeeze the internal plastic clip's "wings" (this clip is yellow, on mine) 'twixt forefinger & thumb (or gently with a pair of snipe-nosed pliers) and pull the black ball coupling upwards whilst applying gentle downward pressure on those little plastic wings. The inner clip that the wings belong to should stay trapped within the coupling but it will retract into the coupling slightly. The cable's outer sleeve's rectangular anchor is held in place in its fork via a tiny white peg which you need to pull outwards against its spring and to its fullest extent (don't force it further!) then slide the cable's anchor upwards out of the fork. Here's a pic pointing out the anchor 'fork': 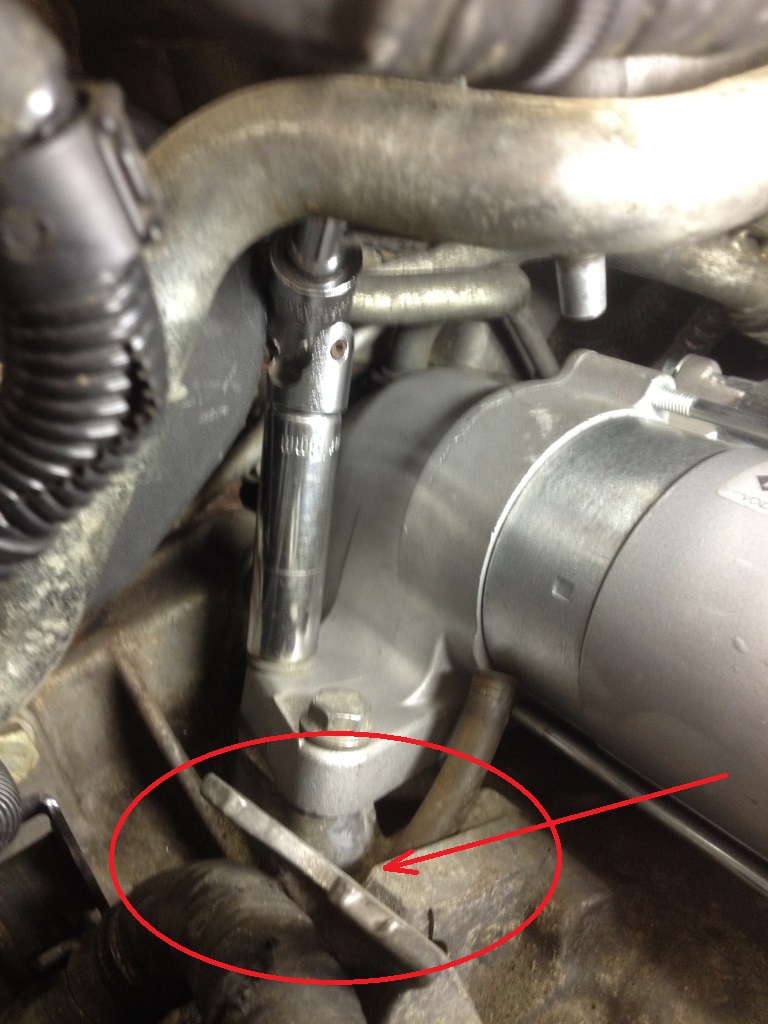 |
||
|
|
|
||
|
patcrean406
|
|
||
|
Member No: #1894
Location: laois |
Thanks very much Steve. I got it in the end. Thanks for your help. | ||
|
|
|
||
|
Jodyone
|
|
||
|
Member No: #1240
Location: Cornwall |
This is a question for Steve, if you're about: I'm about to replace the starter in my car, following your impressive instructions. However the starter I received has only one mounting bolt hole on each side: the "other" one in each case is composed of a pressed in cylinder (presumably locates in the mounting plate) but the hole is blind. From beneath it looks exactly like your old one in the vice, but I can't see from your picture if the holes go all the way through. Potentially, I could drill out the holes- but it looks like I may have bought the wrong starter. Any thoughts? Pics below, sorry I can't get them inline, I'm at a borrowed computer: - Click Here - - Click Here - |
||
|
|
|
||
|
e3steve
|
|
||
|
Member No: #1163
Location: Warsash, Hants & Palma de Mallorca, Spain |
My new one was the same, Jody. I just opened up the pre-drilling from below this boss you see here, 8.5mm or 9mm I seem to recall: 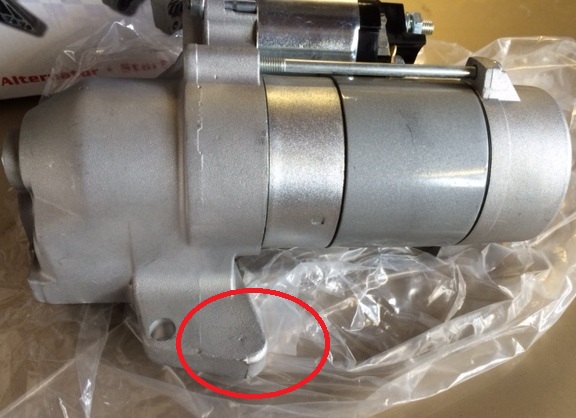
|
||
|
|
|
||
Go to page >>
|
|
 User Colour Key: User Colour Key:Head Administrator, Administrator, C6 owner, Technical Expert, C6 Premier Discount Club |
|
Privacy Policy | Cookie Policy | Site Disclaimer | Contact Details | Warranty | Sitemap | C6 Insurance | Quick Facts | Re Call Info | Downloads | Error Codes
| Site and Graphics created by: C6Dave Forum Icons by Axialis Emotes by Seb |  |


